Monday, March 27, 2017
Wednesday, March 8, 2017
POINTILLISM
Georges Seurat A Sunday on La Grande Jatte—1884
Pointillism /ˈpɔɪntᵻlɪzəm/ is a technique of painting in which small, distinct dots of color are applied in patterns to form an image.
Pointillism is often considered part of the Post-impressionist movement. It was primarily invented by painters George Seurat. While Impressionists used small dabs of paint as part of their technique, Pointillism took this to the next level using only small dots of pure color to compose an entire painting.
Pointillism reached its peak in the 1880s and 1890s after the Impressionist movement.
7th Grade Pointillism
Students will choose a picture that does not have a great deal of detail, but has lots of color! Still Life or nature pictures work best. (sunset, flowers, fruit, animals, birds, seascape, landscape etc.)
Materials: White drawing paper, a pencil, fine tipped markers and a colored photograph
Students will create a very light sketch in pencil on the white drawing paper.
I will demonstrate the technique of pointillism with the fine tipped markers. Students will begin dotting their pointillism composition when their drawing is complete. Please refer to the colors in the photo and try to recreate the composition with dots only. NO LINES, NO COLORING! Blend and layer colors, fill the entire piece of paper!
DOTS ONLY! Steps in creating a pointillism...
7th Grade Student Examples......
Friday, March 3, 2017
Pop Art!
8th Grade Candy Paintings
Pop Art - art based on modern popular culture and the mass media, especially as a critical or ironic comment on traditional fine art values.
Objective: Students will create a Pop Art style candy painting in bright colors with paint.
Materials: 12 x 12 inch white paper, pencil, reference pictures, paint and sharpies
Steps:
- Students will choose a candy to draw. Look at pictures online.
- On the white drawing paper, students will draw a line drawing of a section of the candy wrapper in pencil. The candy can lead in from the border - draw nice and large. The drawing should be very detailed, try to create the section as exact as possible!
- Students will paint their Pop Art Candy Drawing. Take your time! Do not paint wet areas next to wet areas. Break it down into sections, paint wet paint only by dry paint.
- When the candy is complete, choose a bright color that contrasts the candy to paint in the background. Bright and Bold!
- Outline and give detail with the black sharpie.
- Turn in for evaluation.
Questions:
Is the candy drawn large and have good detail?
Was the painting process completed in steps, wet by dry?
Did the student show good craftsmanship and complete the painting with a background color?
Did the student finish the work with a black marker, outlining and completing the detail work?Friday, February 3, 2017
The Scream Parody
7th Grade Art Drawings
The Scream by Edvard Munch
1893, Oil,Tempera and Pastel on cardboard, Located at the National Gallery in Oslo, Norway
7th grade art students studied about The Scream by Edvard Munch and created their own Scream Parody oil pastel drawing!
Materials: drawing paper, pencil, oil pastels, and Scholastic Art Edvard Munch - Working With Expression
Students began their lesson by watching a YouTube video "How to Draw The Scream By Edvard Munch" by Artrageous with Nate https://www.youtube.com/watch?v=7rDLIM5Ezmk
Students then created their own version of The Scream! We discussed how to properly use oil pastels and how to blend and layer colors.
The Scream by Edvard Munch
1893, Oil,Tempera and Pastel on cardboard, Located at the National Gallery in Oslo, Norway
7th grade art students studied about The Scream by Edvard Munch and created their own Scream Parody oil pastel drawing!
Materials: drawing paper, pencil, oil pastels, and Scholastic Art Edvard Munch - Working With Expression
Students began their lesson by watching a YouTube video "How to Draw The Scream By Edvard Munch" by Artrageous with Nate https://www.youtube.com/watch?v=7rDLIM5Ezmk
Students then created their own version of The Scream! We discussed how to properly use oil pastels and how to blend and layer colors.
Thursday, January 26, 2017
8th Grade Zentangle
Inventive Texture Nature Drawing
Objective - To encourage students to use their imaginative powers beyond the limits of academic portrayal, by transforming a realistic item of nature into a detailed zentangle design.
Materials - 9x12 white drawing paper, a pencil and a black pen
Procedure -
1. Draw a close up view of a single aspect of nature: fish, animal, insect…
The drawing should be large so that it occupies most of the paper. Any remaining space on the paper is considered as the object’s environment.
2. After the completion of the drawing, the entire composition is carefully outlined with the black pen.
3. Fill the entire composition with inventive textures and designs, zentangle.
Consideration is given to the shapes within the object that are patterned into inventive textures such as circles, triangles, checkerboards, ovals, lines etc. These too are outlined in black. Contrast is created by placing lines and shapes closely together for dark areas and farther apart for lighter areas.
4. After the entire object is complete, students will attend to the background so that it too contrasts with the main idea. The simplicity of the background depends on the complexity of the main object.
Evaluation will be based on imaginative portrayal of the object and background, selection of inventive textures, neatness and craftsmanship.
Friday, January 13, 2017
Thursday, December 8, 2016
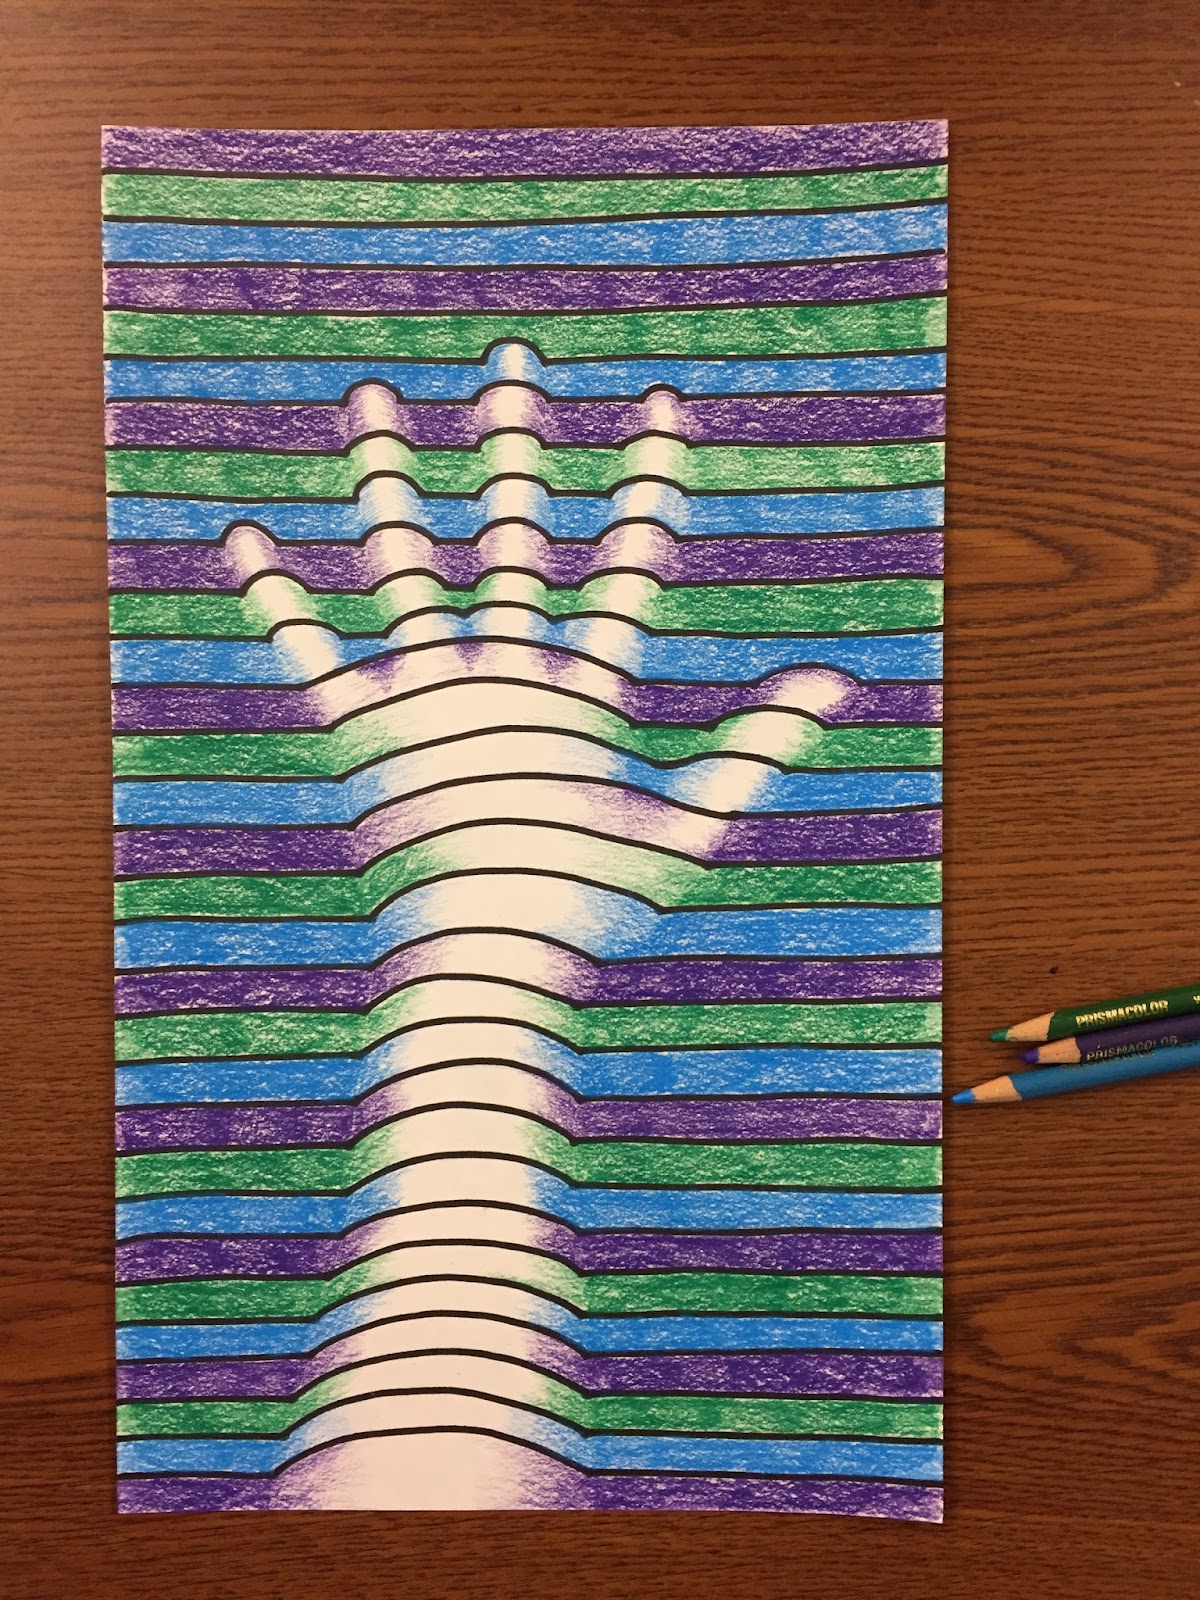
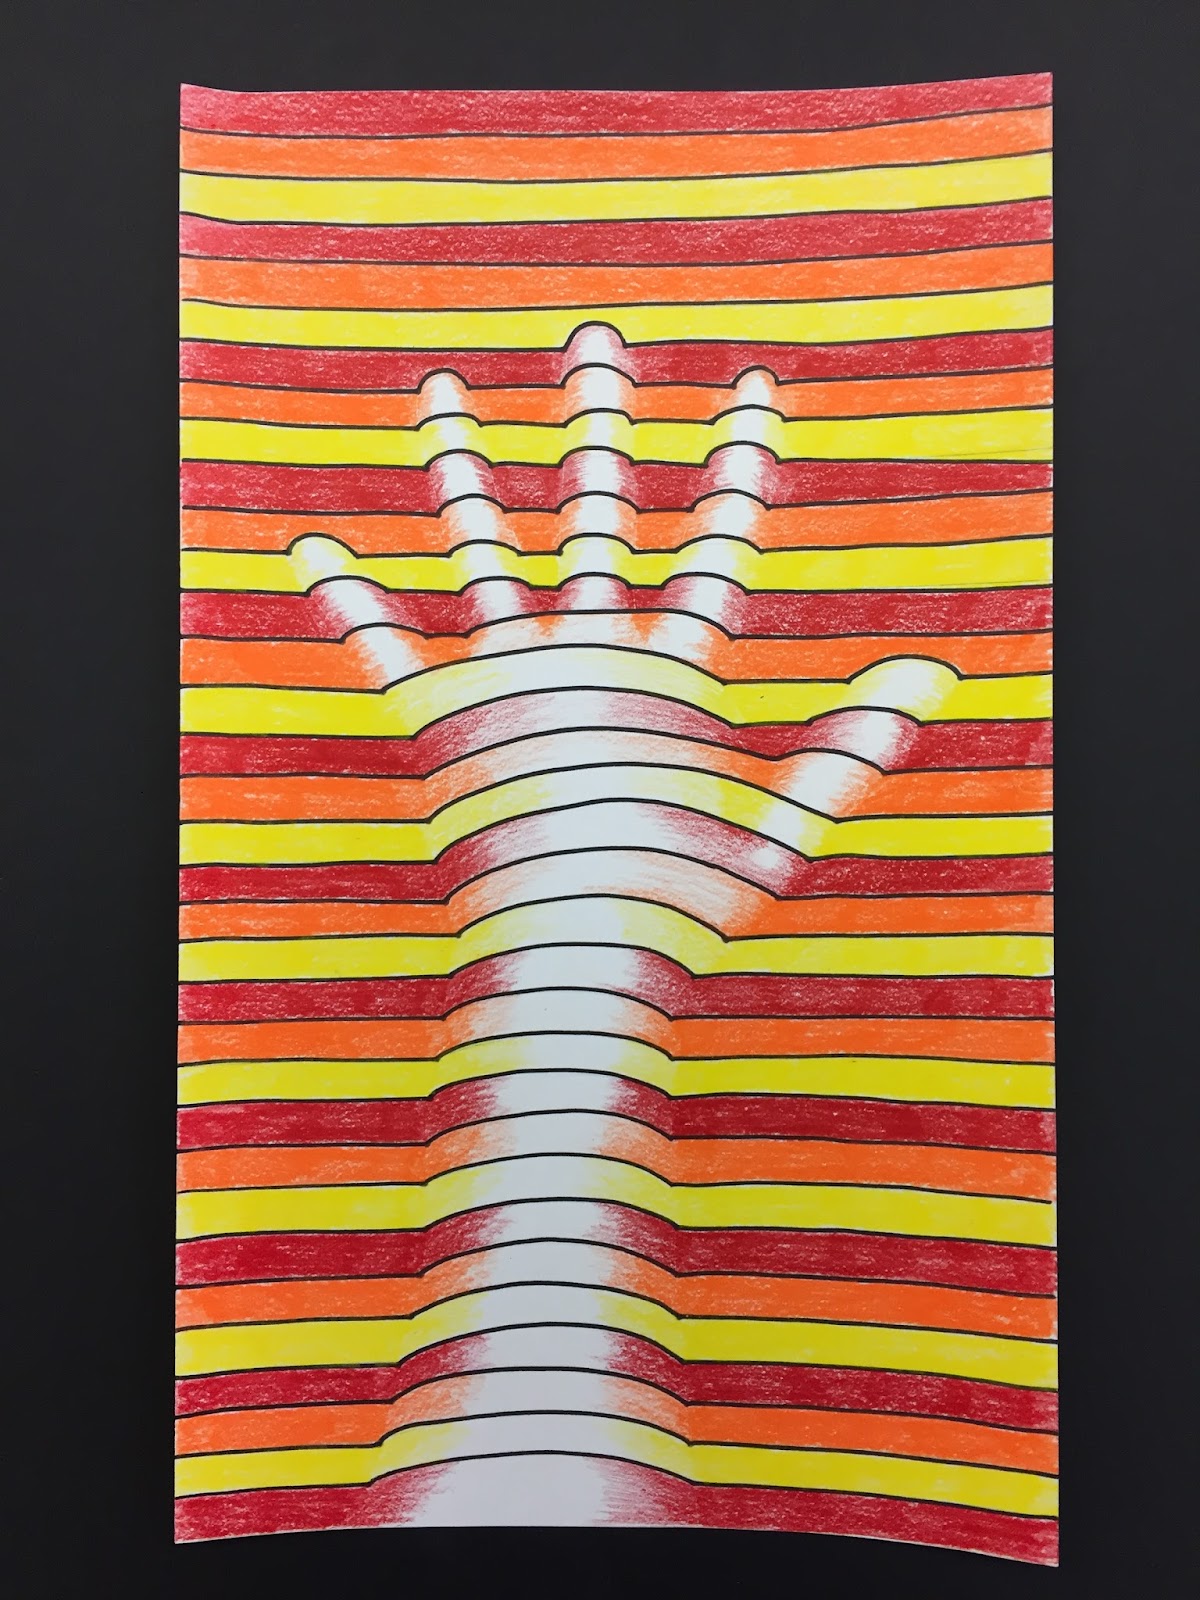
8th Grade Op Art Hand Design
Optical Illusion – a visual image that looks real but is not
Warm Colors - Red, Orange, Yellow
Cool Colors - Blue, Violet, Green
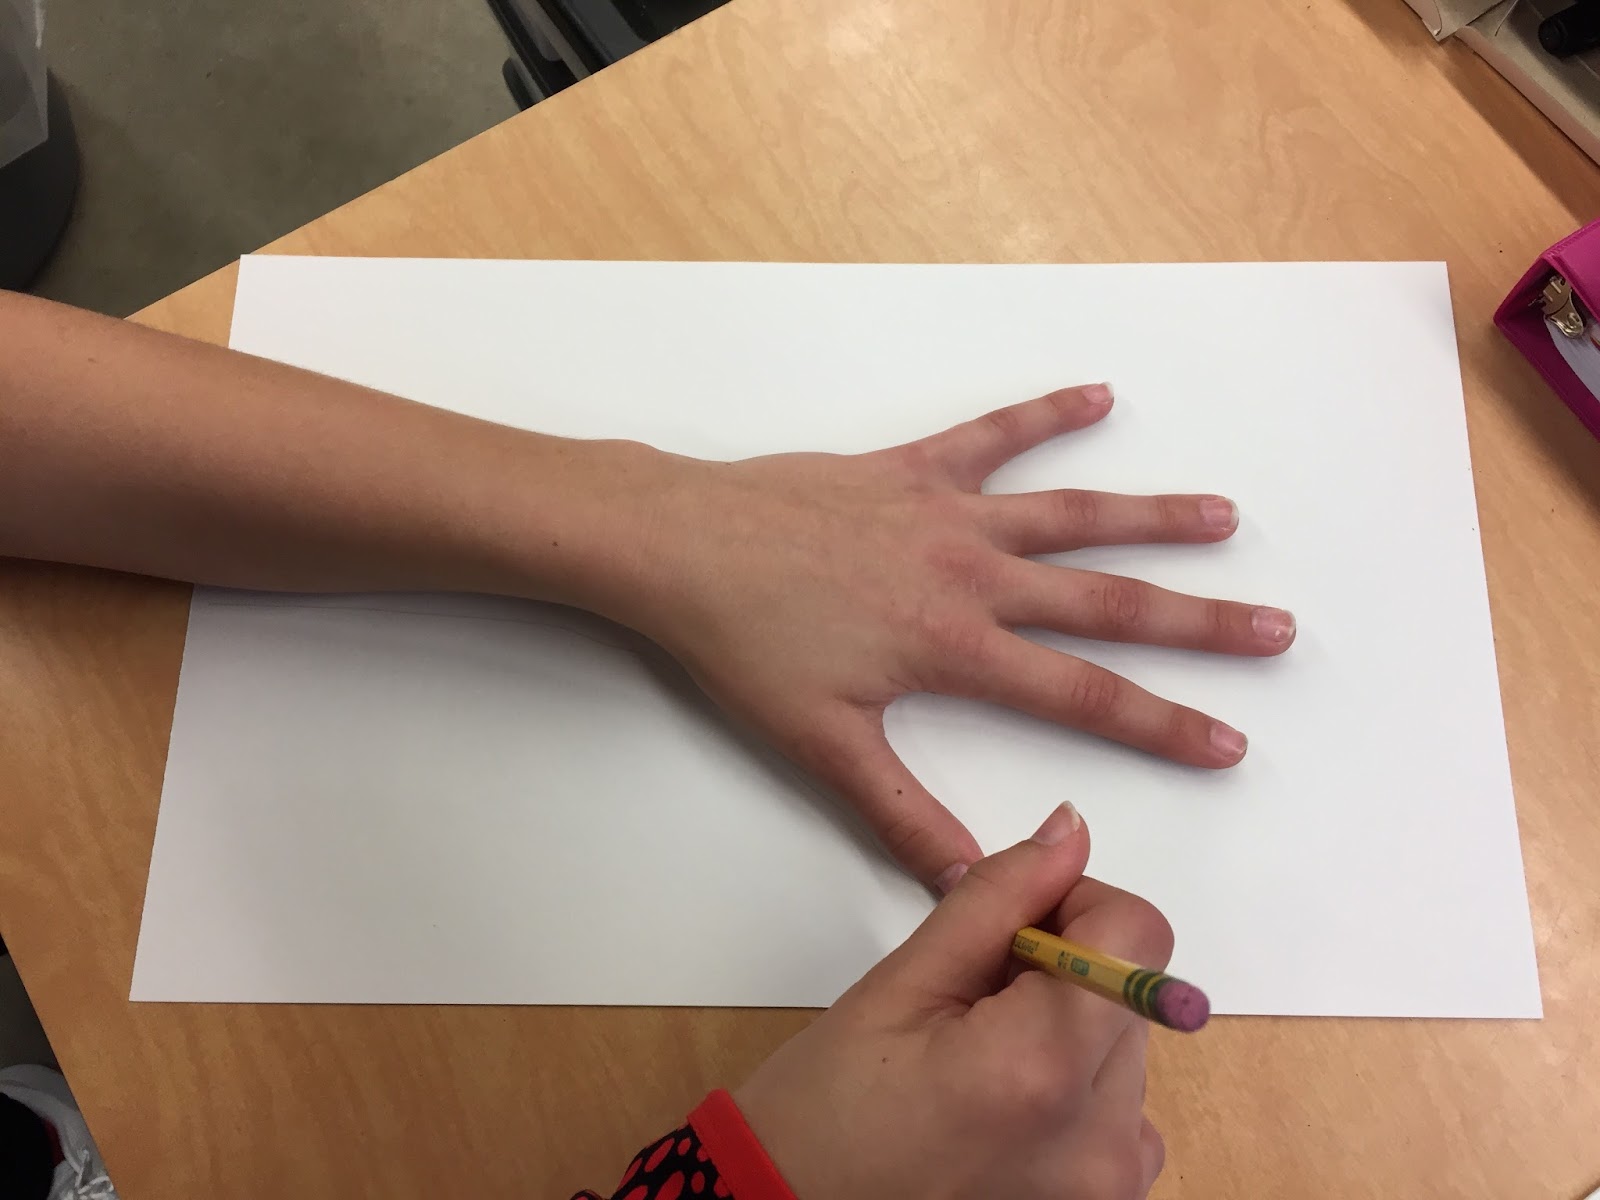
Step #1: Trace your hand with a pencil, include your forearm.
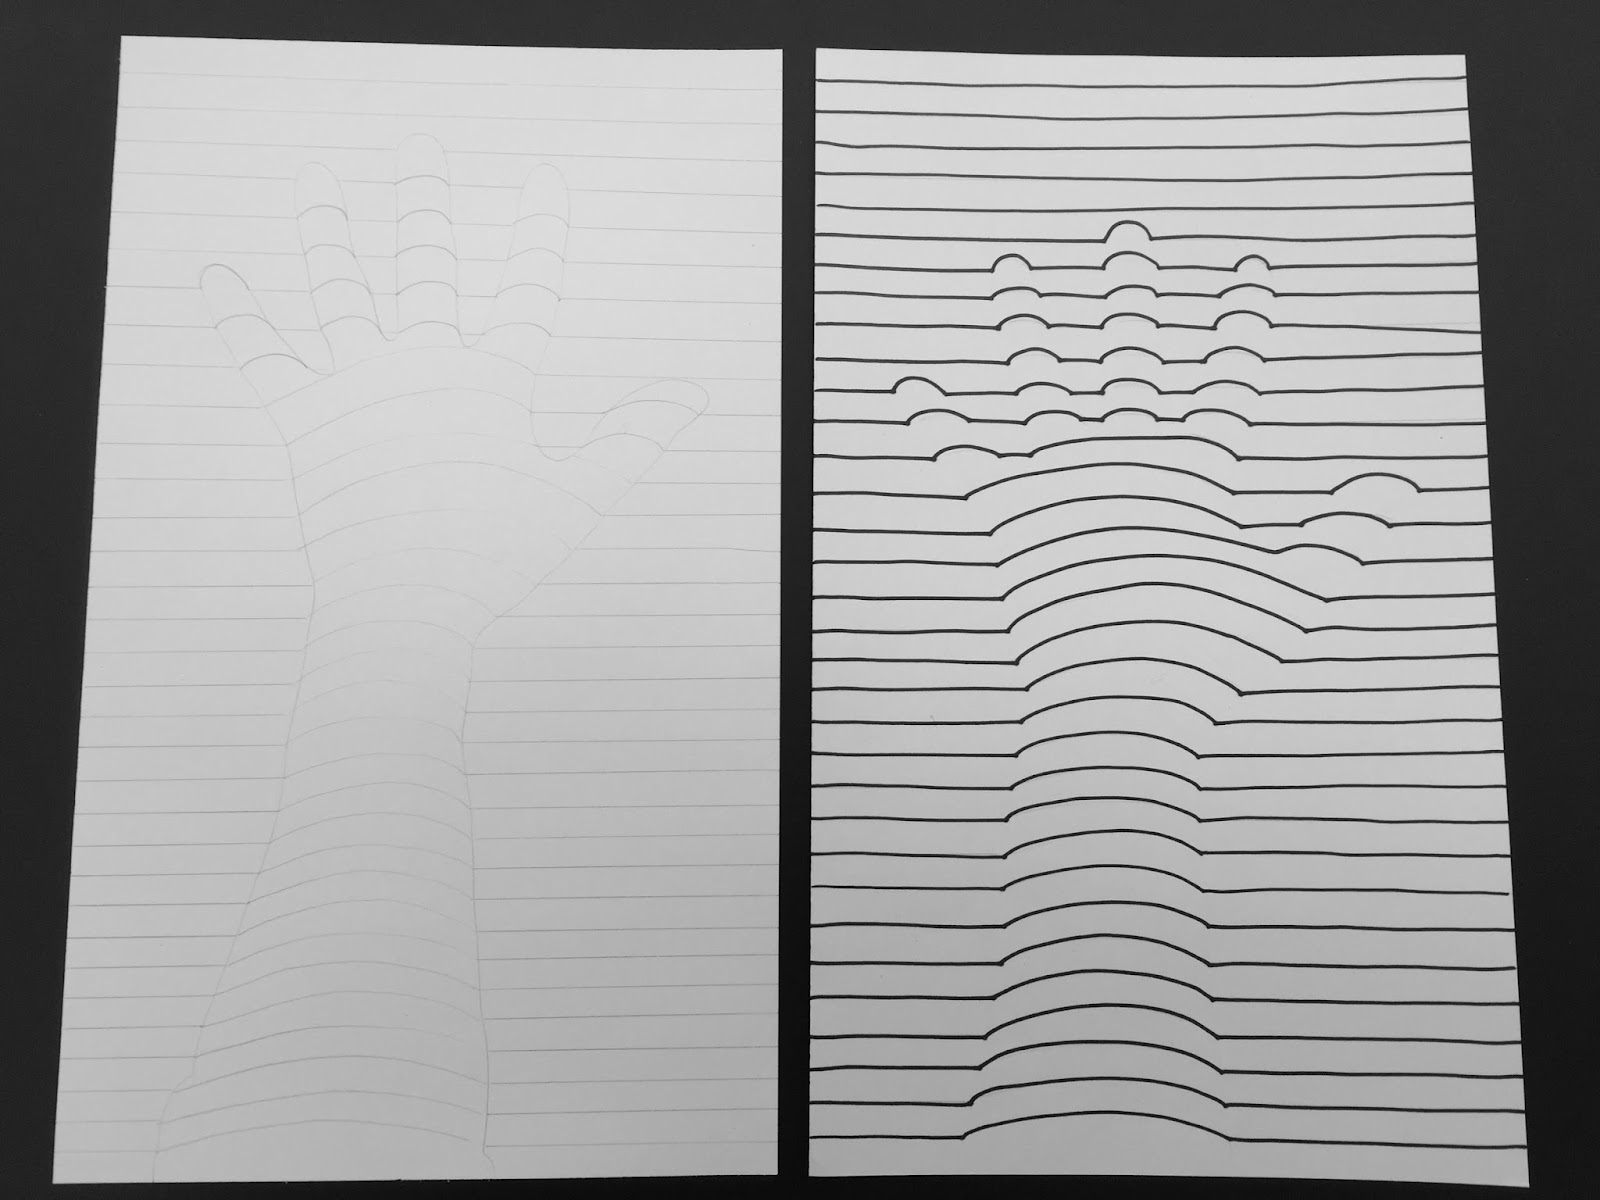
Step #2: With a ruler, start a horizontal line at the edge of the paper. When you reach your wrist make the line curve up as if it was going over your actual wrist Do this in pencil first.
Trace over all your contour lines with a Sharpie
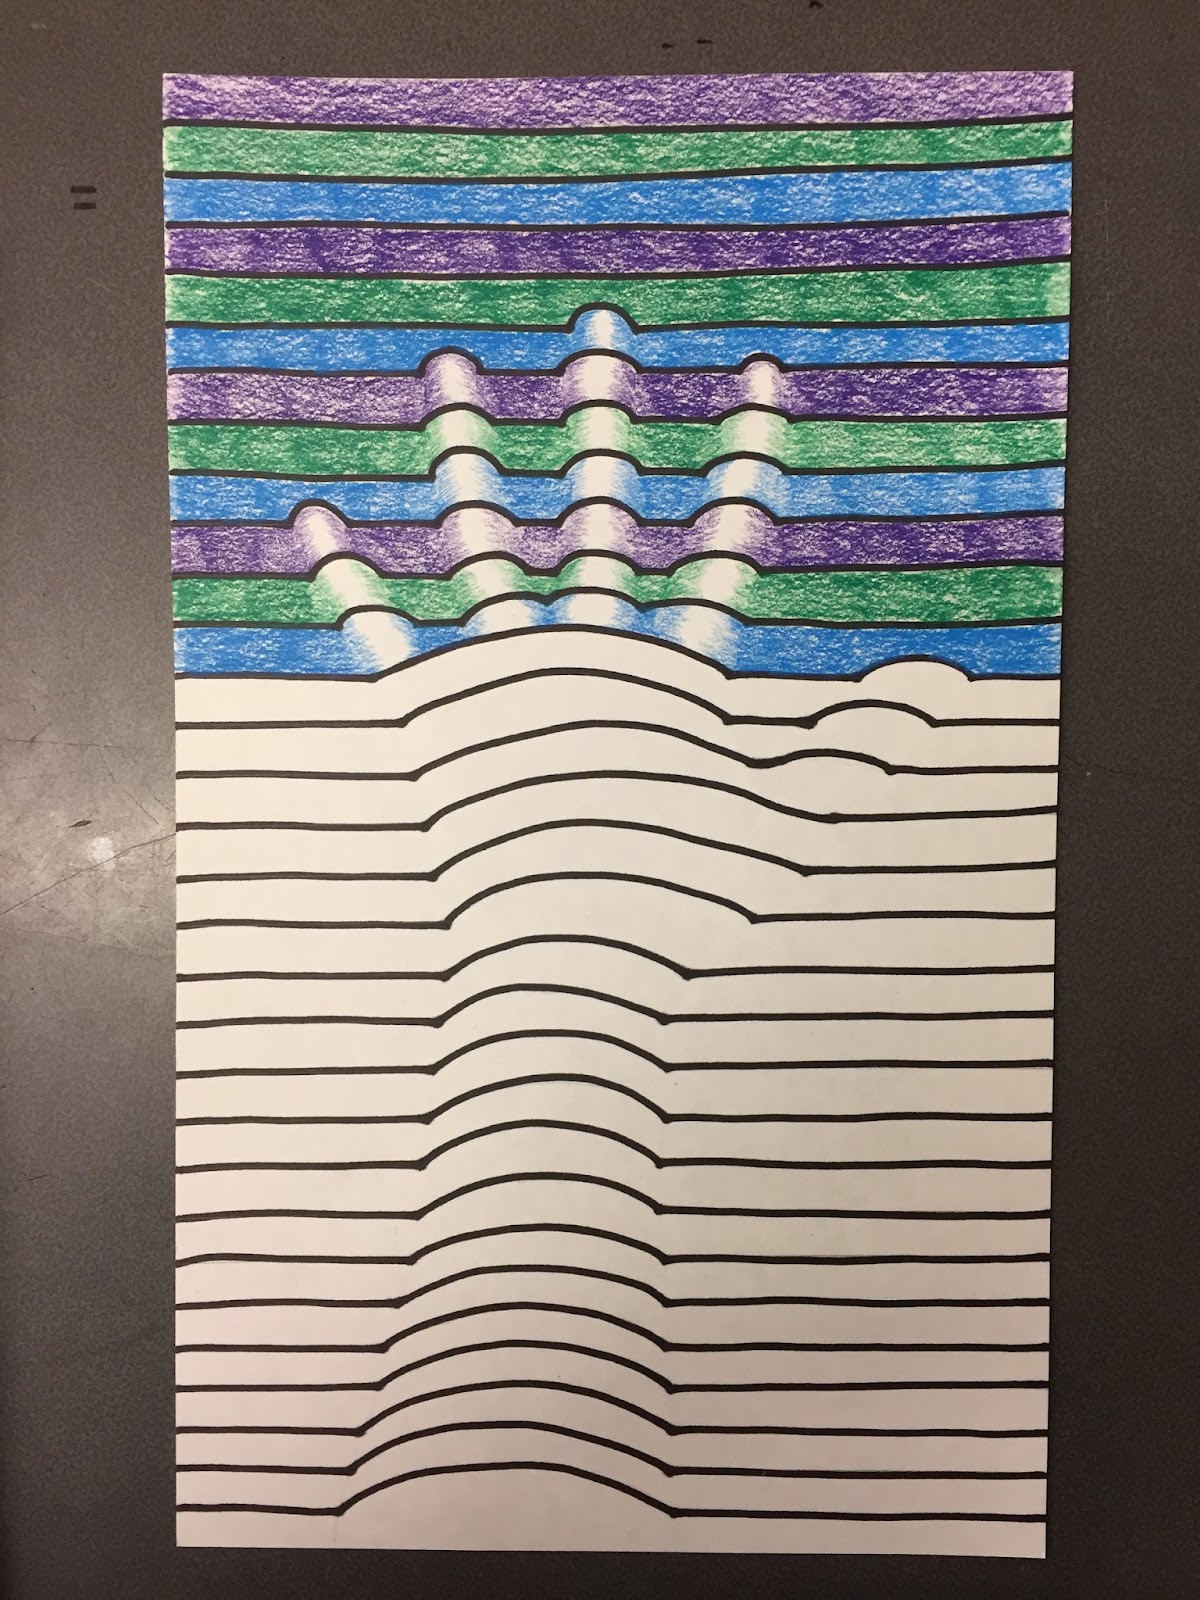
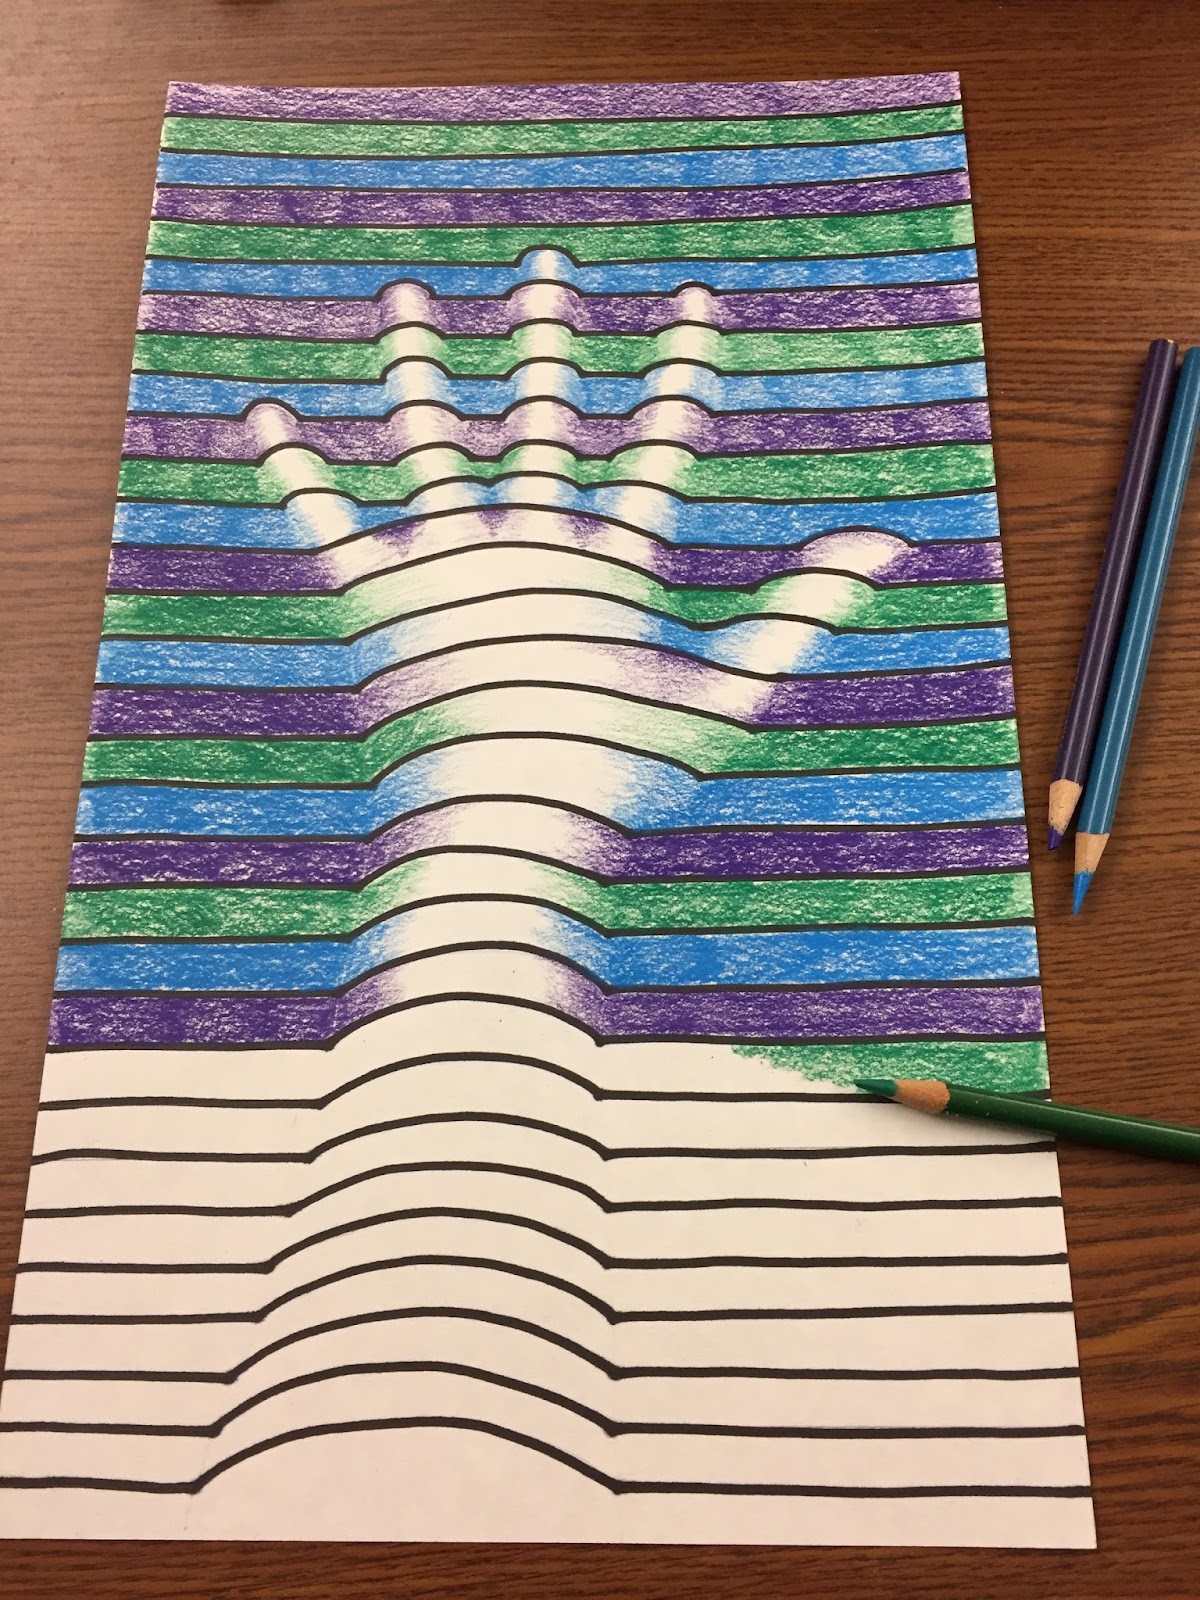
Choose a color scheme of either warm colors or cool colors
Warm colors - Red, Yellow and Orange
Cool Colors - Blue, Violet and Green
- DO NOT TRACE THE PENCIL OUTLINE OF YOUR HAND WITH SHARPIE!
- Erase the pencil outline of your hand
- Start at the top of the page with your colors and work your way down the page.
- Leave a highlight in the center of the curved lines - where the fingers and hand are.
Subscribe to:
Posts (Atom)