Thursday, December 7, 2023

Crayon Resist / Watercolor Holiday Ornaments


Vocab: overlap, wash, resist, highlight, balanced, shadow, composition  


Materials:

Paper, watercolors, paint brush, water, crayons, pencil, circle template


1. Complete a pencil drawing of holiday ornaments using circle templates,

overlapping circles. Include a highlight, top and hook on each ball.

Be creative with your design (the ornaments could be in a bowl, on a

table top, forming a wreath etc.) You can add to the design

(evergreen, holly, words, lights etc) Be Creative!

2. Trace over the drawing with a crayon. 

3. Watercolor each of the ornaments with bright colors.

Leave the highlight white on each one.

Do not paint wet by wet with the watercolors.

The crayon outline should resist the paint.

4. Finish painting all ornaments and the extras.

You may add details with the crayons, as well. Be creative!

Monday, October 9, 2023

Treasure Map Drawings


Materials: pencil, paper, ruler, sharpie, chromebook for ideas


Objective: Students will create a treasure map of an imaginary island.

Please draw in pencil and then outline with a sharpie.
The island can take on the contour of an object.
The map criteria is listed below. Have fun and be creative!

Include the following: 


A detailed border (outside edge), 

1 rose compass (N,S,E,W) 

4 land feature symbols, 

1 key for the symbols, 

2 landmarks, 

2 water symbols in the water, 

1 sea monster or 1 ship 


Use your chromebook to research ideas and pictures.


When you are finished drawing everything in pencil,

your map should be inked with a sharpie or markers.

You may use color (markers or colored pencils) on your map.


Student Examples...

Friday, September 22, 2023

 One Point Perspective Shapes Design


Objective: Students will learn how to draw one point perspective

shapes and create a design with perspective shapes.


One Point Perspective…a mathematical system for representing

three-dimensional objects and space on a two-dimensional

surface by means of intersecting lines that are drawn vertically

and horizontally and that radiate from one point on a horizon line…


Example...‘Bedroom in arles’ by Vincent van Gogh – identifying perspective lines

Example...‘Bedroom in arles’ by Vincent van Gogh

Please watch a one point perspective demonstration…

Mrs. Miller's Demonstration for One Point Perspective Shapes


The demonstration drawing, finished…

Steps:

l. Draw a dot around the center of your paper.


2. Draw eight - ten shapes on the paper. Vary the sizes of

your shapes. Spread the shapes out, around the center dot.

3. With a ruler, draw lines from the corners of each shape to the dot.

4. Outline the final drawing with a sharpie or colored marker.

5. Color the shape a dark shade of color.

6. Color inside the drawn lines with a lighter shade of the same color. 

Add shading–darker toward the dot and lighter as you move closer to the shape.

One Point Perspective Shapes Design…


Thursday, September 21, 2023

Op Art Warm Color / Cool Color Design

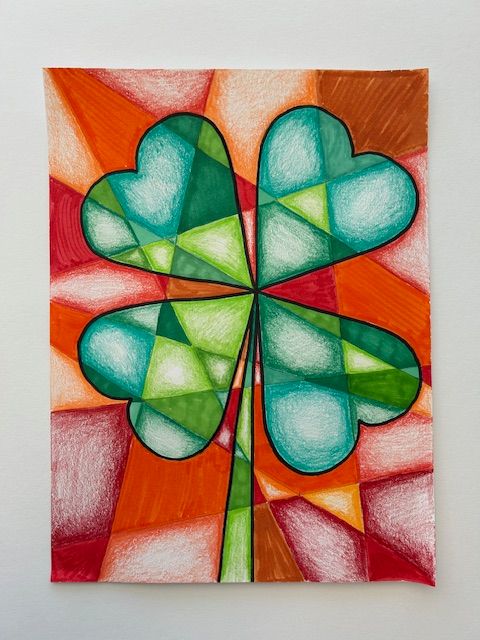
 Op Art Cool Color/Warm Color Design 

Materials: white paper, pencil, ruler, markers, colored pencils

Instructions: Mrs. Miller's Demonstration Design Demonstration

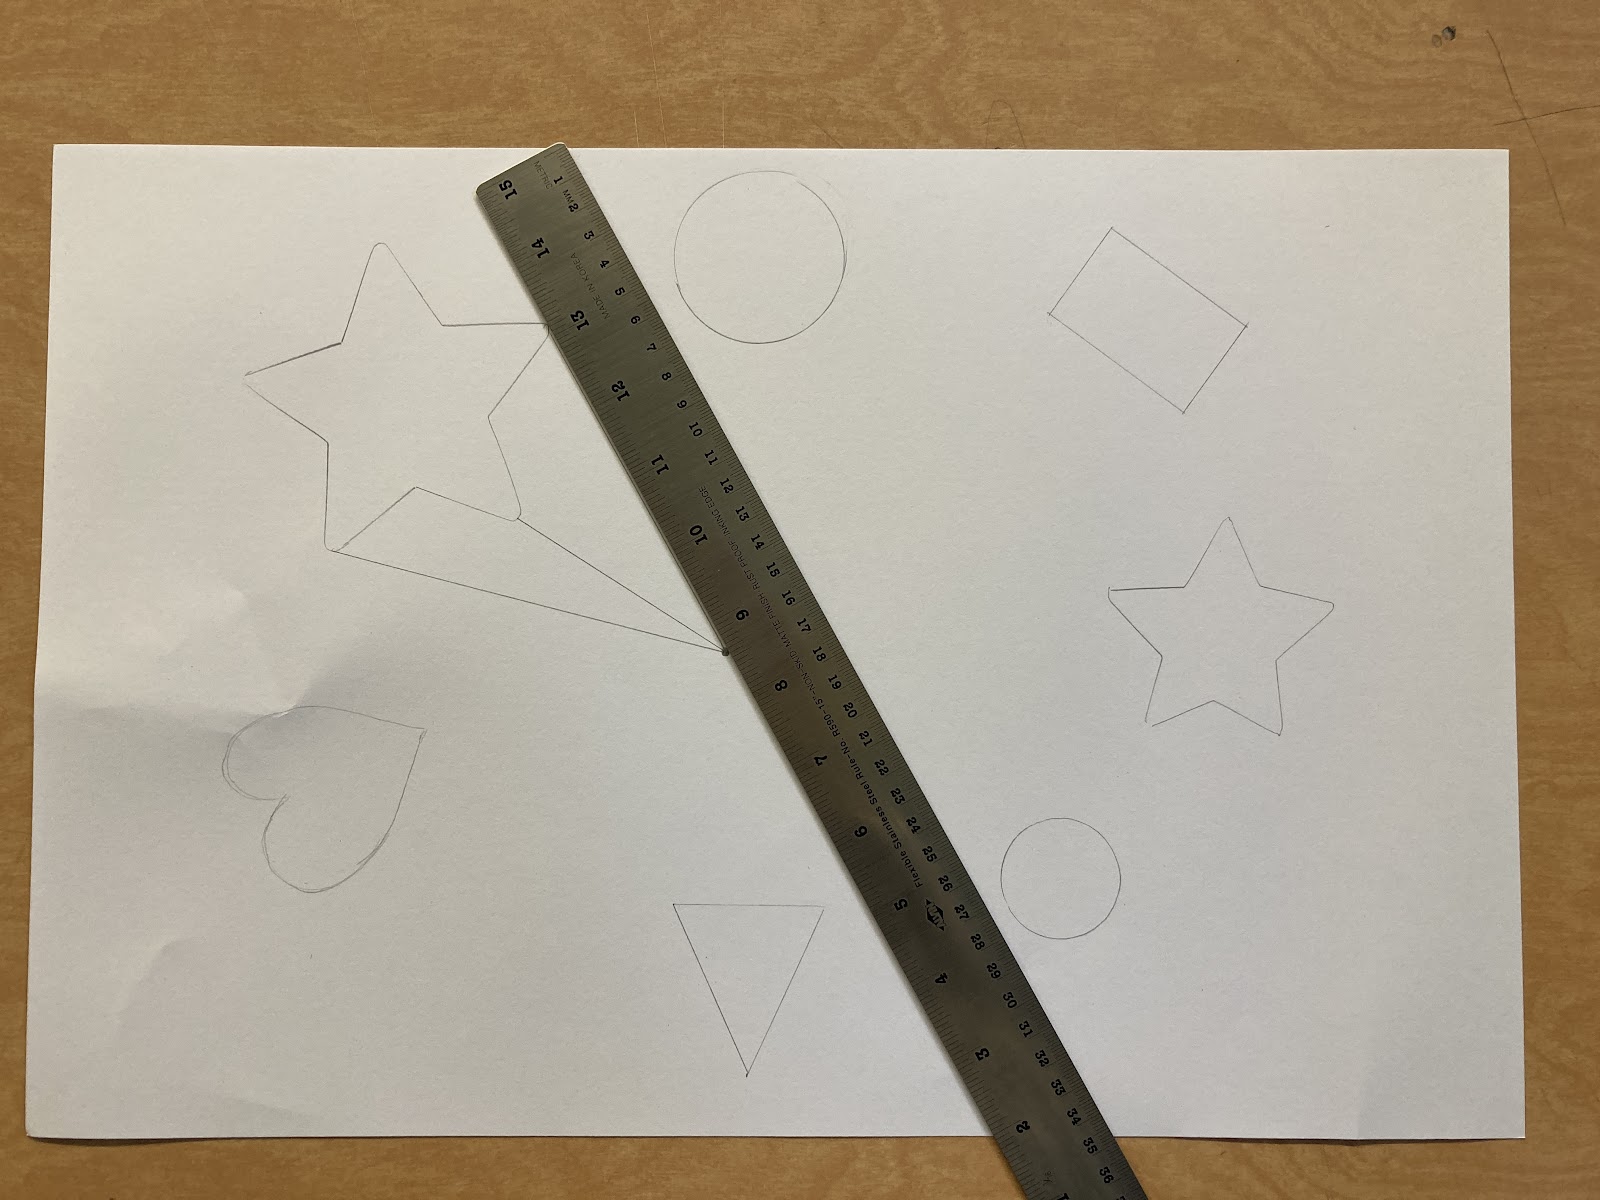
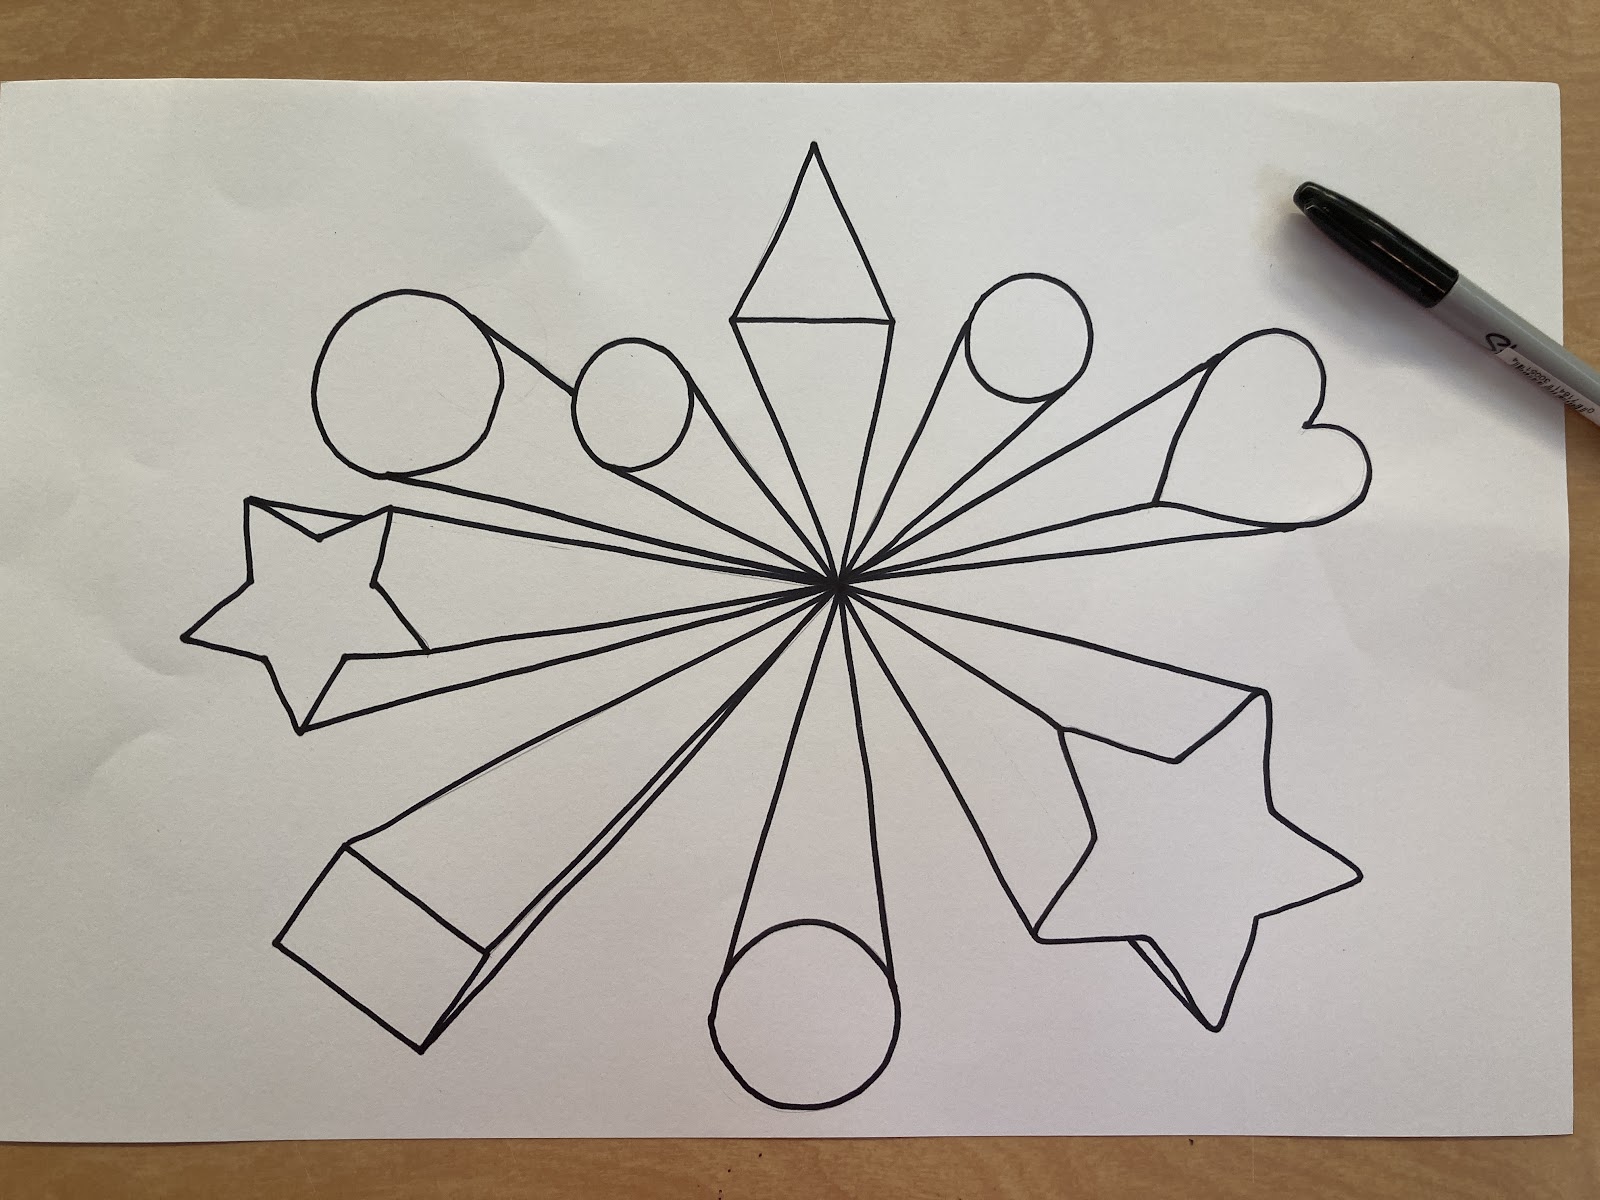
1) Using a ruler, locate the center of the page (corner to corner) - draw a dot with a pencil. 

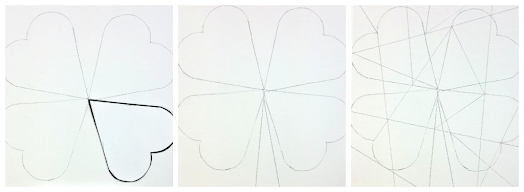
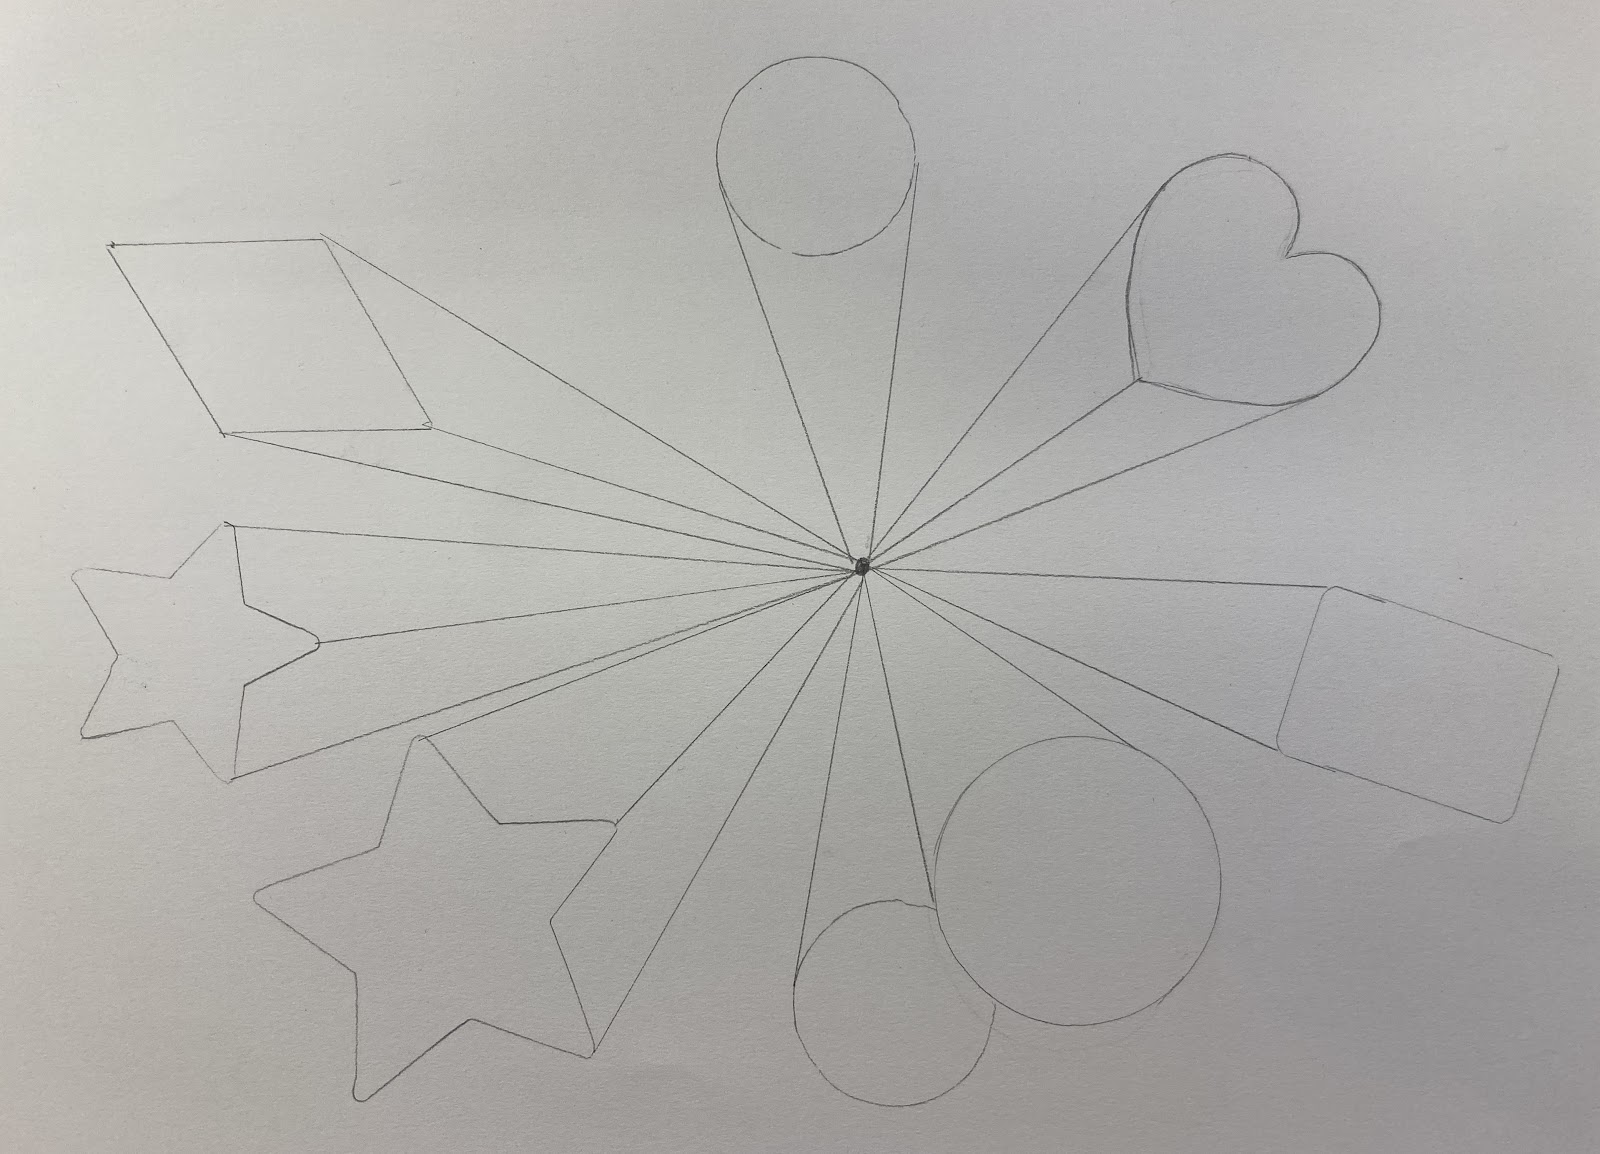
2) Still using the pencil, draw 6-8 straight lines through the center. When finished, you should have an EVEN NUMBER of sections. (12, 14,16)

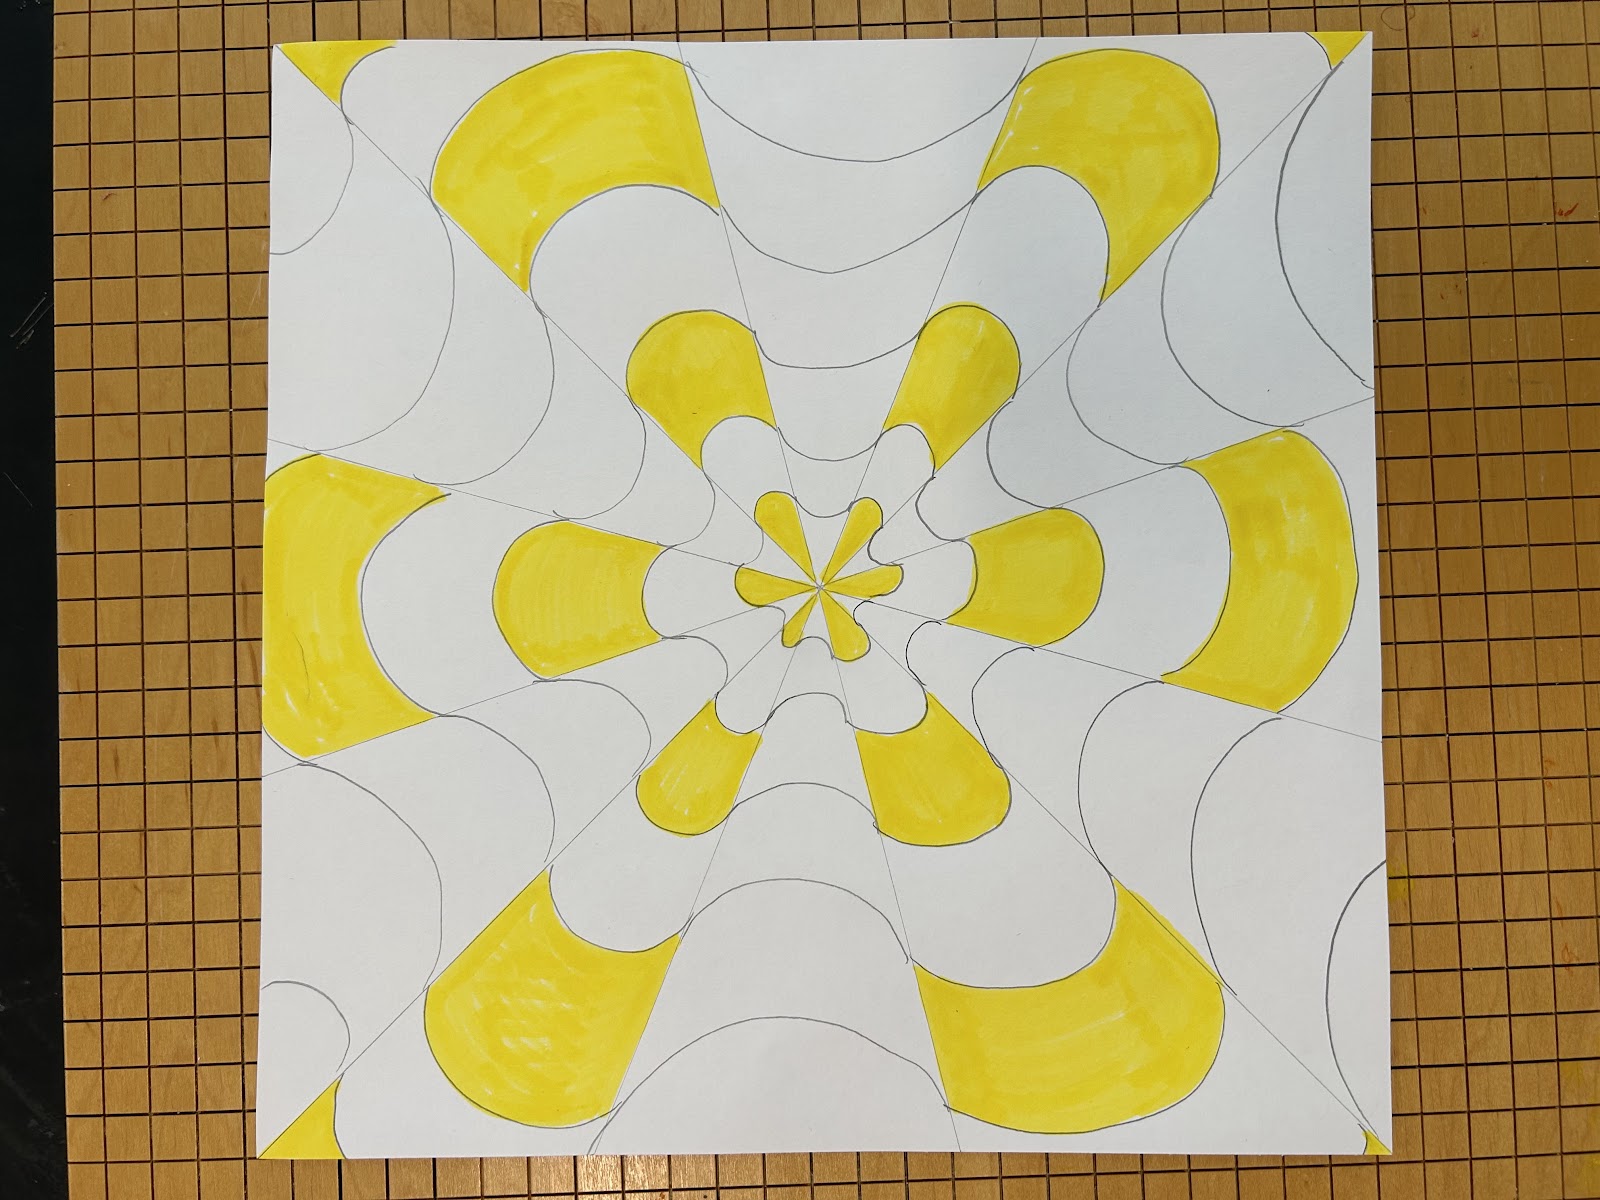
3) Still using the pencil, draw "happy face" curved lines in alternate sections. 

4) Using the pencil again, draw "sad face" curved lines in the leftover sections. 

5) Please Watch...Warm Colors / Cool Colors

Choose one warm color and one cool color. 

Warm Colors - Red, Orange, Yellow 

Cool Colors - Blue, Green, Violet 


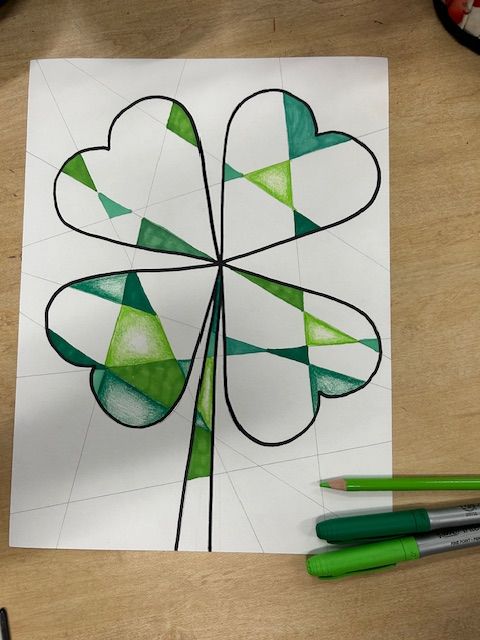
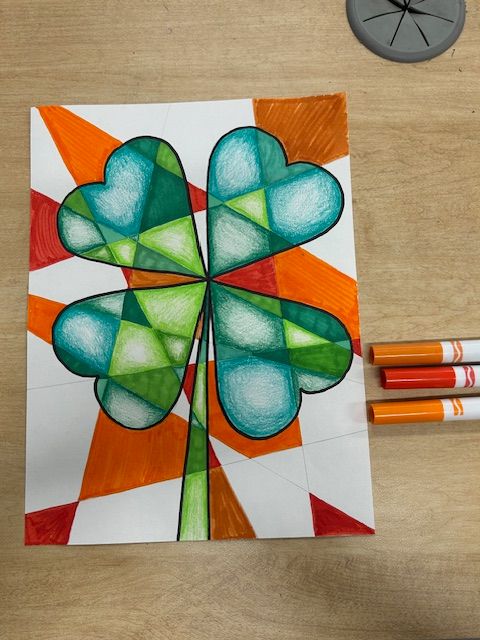
6) Color in every other section with a warm colored marker, alternating every other one. (Example below, yellow marker in every other sad face section) 


Next, pick one cool color. Alternate sections by warm and cool. Please refer to the picture below. Purple for happy faces and red for sad faces. 

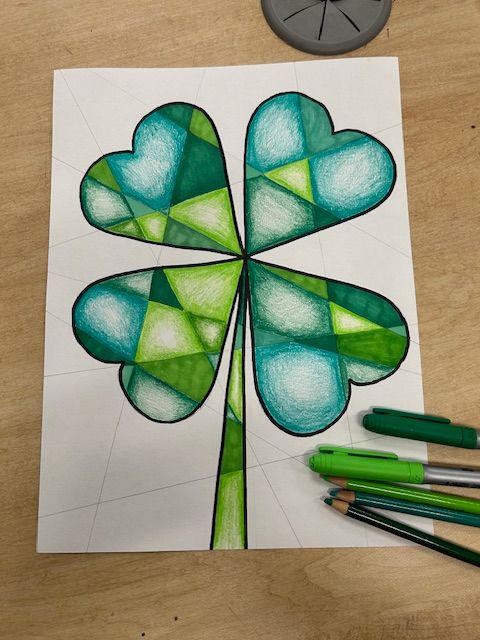
7) After every other section is filled in with marker, shade the leftover sections with the same color, colored pencil. Try to leave a highlight in the middle of each section. 

8) Outline with a Sharpie.

Thursday, October 28, 2021

The Great Wave

 The Great Wave off Kanagawa


Art History: Please watch… The Great Wave


Objective - Students will learn about The Great Wave off Kanagawa

by Hokusai, and create their own version of The Great Wave!


Materials: Pencil, Paper, Sharpie, something to color with...

Markers, crayons, colored pencils, oil pastels or paint (your choice)


  1. After learning about The Great Wave off Kanagawa, plan and create a pencil drawing of your version of The Great Wave. Be creative! Fill your space. Use the original as inspiration.

You may create a parody of The Great Wave…

(example Bart Simpson surfing on the wave, etc.)


  1. Outline the pencil drawing with a sharpie or marker.


  1. Choose a color medium.You may choose from crayons, markers, colored pencils, oil pastels or paint.  Please remember what we have previously learned about the material choice and apply color to your drawing. Everyone’s project will be completely different. Be creative with the colors! Please demonstrate good craftsmanship with your medium choice. 


Example created with crayons:


Student Examples:


Interesting facts about The Great Wave Print...15 Facts 


Assessment: 25 points


Did you plan and execute a pencil drawing of The Great Wave?  5 points

Did you apply color to your composition? 

5 points

Did you demonstrate good craftsmanship with your choice of materials? 

5 points

Did you successfully demonstrate good time management and clean up procedures daily? 

5 points

Did you fulfill all the requirements and complete and turn in your project?

5 points


Tuesday, April 20, 2021

Pencil Drawing

 Drawing and Shading 

How to draw and shade 3D shapes


Objective: Students will learn how to draw 5,

3 dimensional shapes and shading each one.

Students will create a drawing of a

Sphere, Cube, Pyramid, Cone and Cylinder. 


Student Goal - Watch the video and view all

examples, practice drawing and shading each shape,

create a final shaded still life drawing of at least 4 shapes,

shade them according to a light source and create

shadows.


Please watch my demonstration on how to draw 3D shapes.

Mrs. Miller Demonstrates Drawing 3D Shapes


Please practice drawing the 5 3D shapes.


Please view this youtube video on how to shade....

https://youtu.be/DCyJ1LMTzxk


Please refer to the beginning of the video and practice

shading from dark to light with your pencil. More pressure

with the pencil, will create a darker shade. With less pressure,

the shade will be lighter.


After practicing shading, please practice shading your

shapes from day 1. 


Refer to the following pictures from Google Images...


Student Example...

Create a still life drawing of at least 4, 3D shapes.

Be creative. Shapes may overlap. Look for

reference pictures.

Choose a direction that the light source is coming

from and shade the shapes accordingly.

Please refer back to the videos from the first two days

of the lesson.


Examples...


Student Examples...


Evaluation Questions:

25 Points - 5 points each

Did you draw at least 4, 3D shapes? 


Did you choose a light source direction to

shade from?


Did you shade each shape, creating different

values with your pencil? 


Did you create a shadow for each shape,

according to your light source?


Did you use good time management to complete

the project and turn it in on time?


Final Project

Animal Pencil Drawing


Objective: Use the skills previously learned with

drawing and shading to create a pencil drawing

of a shaded animal.  


Materials: Paper, Pencil, Picture References, Eraser


1. Please research animal ideas and look at reference

pictures on your chromebook. Pick a picture of an

animal to draw.

This is a very helpful link to refer to...

Animal Drawing Tutorials 


2. Start with a very light pencil sketch drawing.

Take your time and look at all of the details. 


3. Begin adding texture and shading to your drawing. 

Please refer to and continue to develop the shading

techniques previously learned with the 3D shapes. Try

to achieve the different values from dark to light.


4. Shade your animal and create the texture of their

fur, hair, feathers etc. Take your time! Please look

carefully at your ference picture. 


My example…

Student Examples: