Thursday, October 29, 2015

DOODLE 4 GOOGLE

This week my students have been creating a Google homepage design. Google is highlighting amazing and unique budding artists through doodles on their homepage. This year's Doodle 4 Google contest theme is "What Makes Me...Me". Google is challenging students to get creative and submit a doodle that shows the world their personality.
One talented student's winning artwork will appear on the Google homepage for the world to see. The winner will also receive a $30,000 college scholarship and a $50,000 Google for Education technology grant for their school, among other prizes.
Students designed and created a Google homepage design that was personal to them. After they were finished with their designs, they each wrote an artist statement explaining their unique qualities highlighting what influences them and inspires them.


Some great designs...


My students did an awesome job creating their Google Doodles!


Wednesday, October 28, 2015

CONTRAST-O ART


6th and 7th grade art students designed striking black-and-white images . . . studied positive and negative space design principles . . . and explored the fascinating technique of creating contrast! 

Monday, October 26, 2015

Positive Space/Negative Space Designs with my 7th grade art classes!


 7th Grade    EXPANDING THE SQUARE 


Materials: 9 inch Duet Paper (2 color) squares, Pencil, X-Acto Knife, glue, envelope, 18 x 24 inch black paper

Objective: Create a cut paper collage with a composition where both positive and negative spaces are REVERSED. Use either Symmetrical or Asymmetrical Balance in creating your design.

Vocabulary: Space, Positive Space, Negative Space, Balance, Symmetrical, Asymmetrical


Instructions: 1. Choose a piece of duet paper for the project.
2. LIGHTLY Draw your designs from the edges into the center of the square. Think of the designs as shapes. You should draw on all 4 sides. Do not cut off the corners & don’t go past the center of the paper with any designs. Leave space around all shapes!
3. Teacher will demonstrate the cutting process with the X-Acto knife.
4. Begin cutting shapes from the sides of the square. Immediately put all shapes into your envelope. DO NOT THROW ANYTHING AWAY!!
5. Glue down the main base in the middle of your black paper straight or diagonally.
6. Place all the cut shapes back into the square.
7. Flip shapes out and glue down in the mirror image from where it was cut.
8. Turn in for evaluation.

EVALUATION:
Students will be evaluated on their craftsmanship, understanding of positive space and negative space, and design balance.
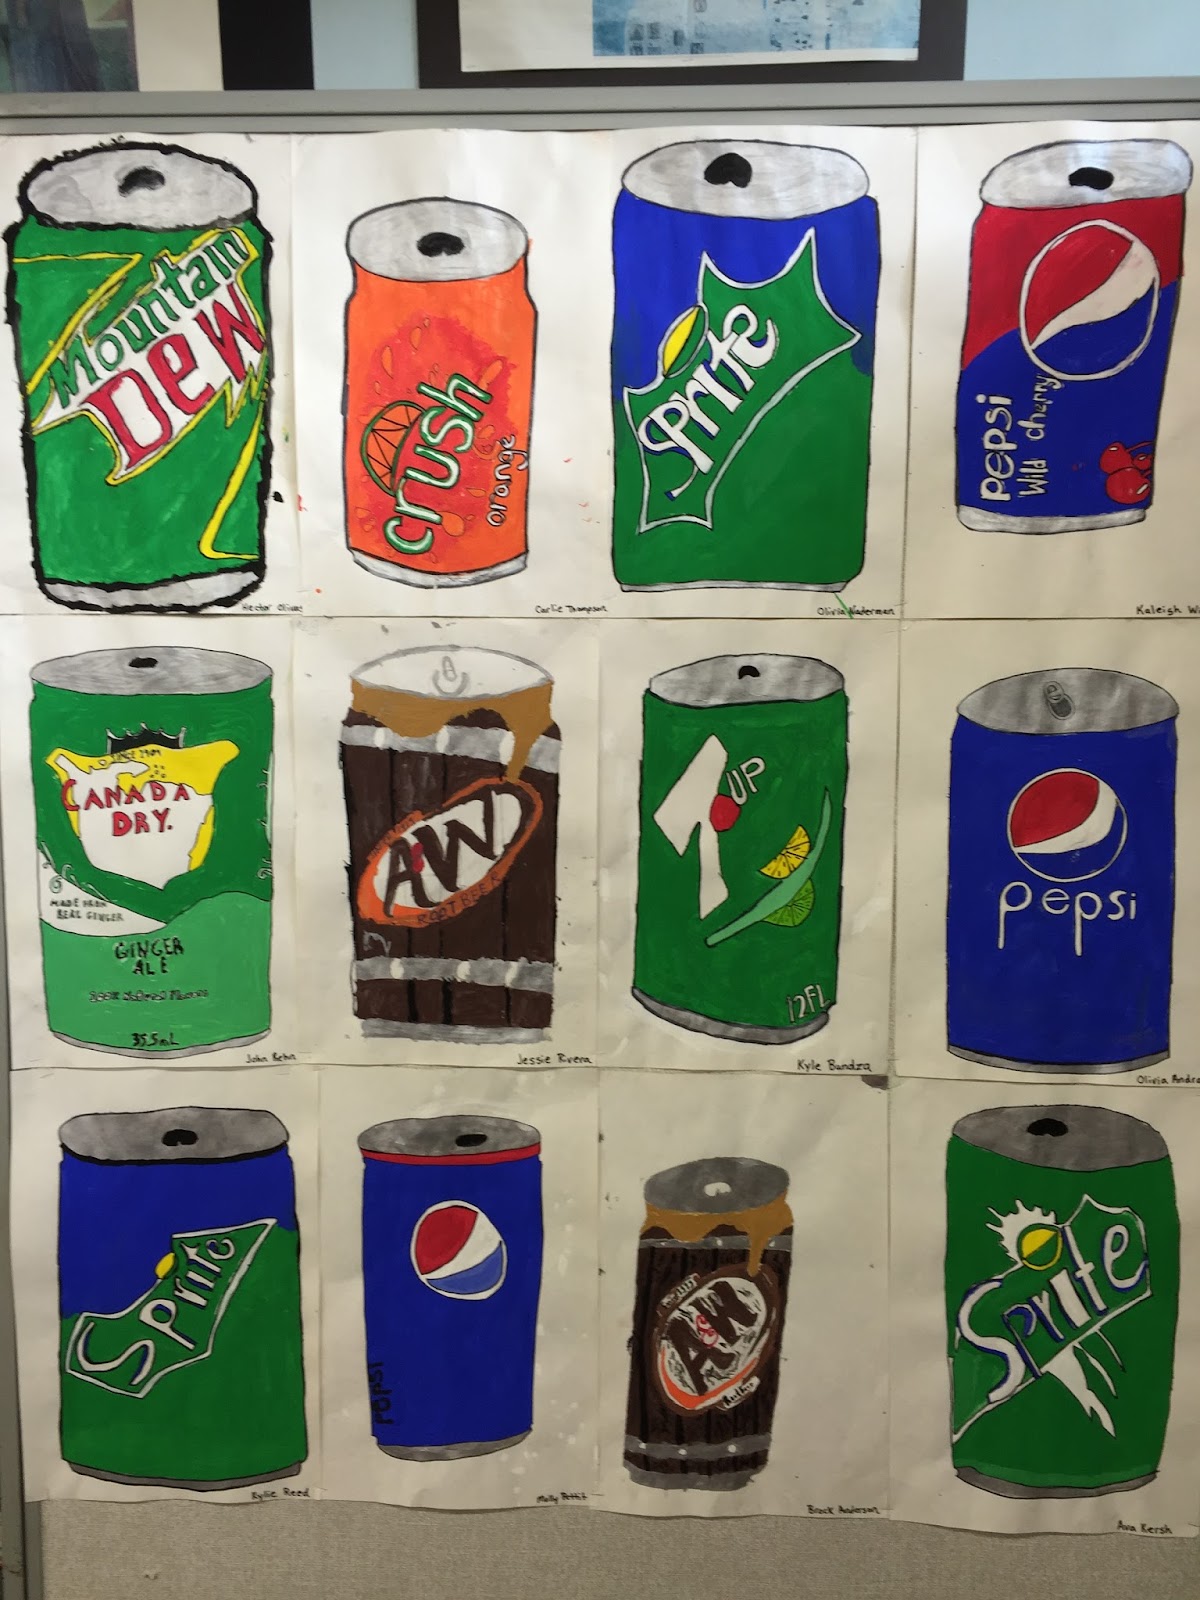
7th Grade Examples:


Thursday, October 22, 2015

Paper Masks

Celebrating October with Paper Mask Making! My 6th grade students had so much fun designing and creating  3D Masks that expressed individual features and characteristics.


Objectives: Students will
  1. Become aware of reasons for masks in various cultures - learn a little about the meaning of masks.
  2. Study the characteristics of masks - design elements.
  3. Create a paper mask using a variety of paper sculpting techniques.
  4. Utilize elements and principles of design in a 3 dimensional form - show balance, repetition - integrate planning
Resources: Maskmaking with Paper by Peggy Flores

Materials:
 9" x 12" Construction paper, assorted construction papers, Tissue paper, Duet paper, Scissors, Fancy scissors(optional), Glue
 
Vocabulary:
Symmetry, balance, relief, geometric, exaggeration, distortion, unity.

Instruction/Motivation:
  1. Show video Maskmaking with Paper. Show students a variety of masks from various cultures. Discuss briefly reasons and meanings of masks in cultures presented.
  2. Demonstrate a variety of paper sculpting techniques that can be applied to mask (curling for hair - folding for noses - curving for eyelids - crimping for hair - etc) Demonstrate clipping the top and chin of mask and gluing to make three dimensional. Encouraging layering colors.
  3. Review color planning
Procedures:
  1. The basic form is made with a 9 x 12 inch piece of construction paper. Fold paper - draw contour for mask and cut out. The paper is held vertically and then the center top and bottom is cut in about 1 ½ to 2 inches. The cut section is pulled together and glued.
  2. Students build onto the mask form considering the following: Symmetry (cut two shapes at one time - cut nose and mouth with center on the fold), breaking the edge (extending beyond the contour of the mask), layering of color, and patterns. Unity is important. Breaking the edge can be accomplished in a variety of ways - adding horns - hair - beards - scalloped edge - geometric shapes
  3. Layer colors. For example a yellow triangle can be added to a black mask. Then a smaller red triangle can be glued in the center of the yellow one. Then a smaller blue circle can then be glued in the center of the red triangle. Use a variety of papers.    
  4. Patterns are made by repeating lines, shapes, or a theme. An interesting pattern can be developed by using the small circles from left-over from punching holes in paper using a hole punch.
  5. Try creative folding to create 3-D forms

Evaluation:
  1. Did students show an understanding of mask characteristics in designing their own mask?
  2. Did students try a variety of paper sculpting techniques to create relief elements?
  3. Did students show design principles of balance, repetition, and unity in placement of colors and shapes?
  4. Did students exhibit craftsmanship in cutting and gluing?

Tuesday, October 20, 2015


Fall Leaf Crayon Resist - Mixed Media                                                       

Mate­ri­als:
• 12x18 white paper
• black crayon, bro­ken in half with paper peeled off
• water­color set and brush
• water
• real leaves in a vari­ety of shapes and sizes
Vocab­u­lary:
Tex­ture - the actual way something feels when touched or the way it looks like it would feel.
Com­po­si­tion — the arrange­ment of the parts of a pic­ture.
Con­trast — the use of oppo­sites together, such as light and dark col­ors or rough and smooth tex­tures.
Direc­tions:
1. Lay leaves one at a time under paper and rub with side of black or dark crayon. Let some leaves over­lap. Don’t stop until the entire paper is cov­ered with leaf rub­bings! (Make sure to sign your name with crayon before start­ing to paint.)
2. Choose a color to paint the back­ground (fall colors work well). Paint the entire back­ground with this one color before paint­ing any leaves.
3. Next, paint leaves using a vari­ety of col­ors, but do not use your back­ground color on any of the leaves, and do not use black!
4. You will know you are fin­ished when your entire paper is painted and there is no white paper left showing!


ART CLUB SHIRTS...

                                  2015 - 2016 Art Club Shirts are ready! 

Friday, October 16, 2015

Painting with paper....

                                                           7th Grade Paper Collage

                                    Wallpaper, Construction Paper, Tissue Paper, Yarn


Thursday, October 15, 2015

Wednesday, October 14, 2015

Fall Paintings...

Recycled Paper Fall Silhouette Paintings


About Mrs. Miller

 When I was in first grade I told my parents that I wanted to be an Art Teacher. I loved creating art! I've never considered any other career over the years. Art is my passion. I love teaching art and sharing my passion with students on a daily basis.
After I graduated from Knoxville High School, I attended Western Illinois University as an art education major. While I was at WIU, I developed a love for teaching. I graduated in 1993 and began my career. I first was a substitute teacher, exploring all grade levels and all subjects. My first "real" job was in Morris, IL as an elementary art teacher. I loved the little kids and their freedom of expression. I was an "art on a cart" teacher in a three story building, so it was crazy at times. Teaching on a cart was a wonderful learning experience. I enjoyed the age group but desired my own classroom.
My second teaching position was at Alexis High School in Alexis, IL. I loved teaching high school art. I loved the small school atmosphere. Teaching high school aged students was very rewarding. It was an amazing experience and I treasure the memories.
Finally, I moved to Churchill Jr. High in Galesburg, IL. I was so fortunate to find an art teaching position only a few blocks from my home. After teaching elementary and high school art, I was up for a new challenge. Jr. High students are so much fun! They are still sweet and free with their creativity and yet they are also mature enough to create some pretty amazing art pieces. I found my perfect fit and I have been here for 15 years. I wouldn't trade my job for anything!