
Art Club Fun!

Materials:
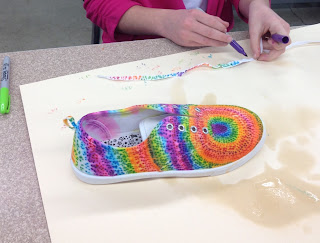
White cotton item to design: Socks, shirt, shoes, scarf, pillowcase etc
Sharpie markers
rubber bands (optional)
Rubbing alcohol
Spray bottle
Directions:
- Twist small areas of the shirt and wrap with a rubber band a few times. I suggest you do the front of the shirt and stretch it over a poster board — otherwise the color runs onto the back of the shirt.
- Use Sharpie markers to add little dots and dabs of color on the little twisted areas. You may also draw a design on the material with the sharpies. (A little color goes a LONG way!) Best colors are with related colors… see below.
- In a well-ventilated area, spray rubbing alcohol onto the sharpie design. The alcohol makes the dye of the marker run together. As soon as the colors have blended together — within a few minutes, take off the rubber bands. Leave the back and front of the shirts separated with the poster board until they dry.
- Put the shirt in the dryer for 15 minutes on hot to heat set the color and it’s ready to wear!
Color Combinations that go well together:
Reds , oranges , yellows and pinks
Browns , greens , and oranges
Blues , greens , and purples
Blues , reds , and purples
        |
I love Tie Dye. I have been using permanent markers to make my designs. Love these techniques you shared. Thanks.
ReplyDeleteGorgeous!
ReplyDeleteGracias por enseñarnos!!!
ReplyDeleteCan these be washed?
ReplyDelete