Objectives: Students will
Resources: Maskmaking with Paper by Peggy Flores
- Become aware of reasons for masks in various cultures - learn a little about the meaning of masks.
- Study the characteristics of masks - design elements.
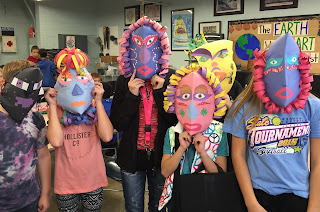
- Create a paper mask using a variety of paper sculpting techniques.
- Utilize elements and principles of design in a 3 dimensional form - show balance, repetition - integrate planning
Materials:
9" x 12" Construction paper, assorted construction papers, Tissue paper, Duet paper, Scissors, Fancy scissors(optional), Glue
Vocabulary:
Symmetry, balance, relief, geometric, exaggeration, distortion, unity.
Instruction/Motivation:
Procedures:
- Show video Maskmaking with Paper. Show students a variety of masks from various cultures. Discuss briefly reasons and meanings of masks in cultures presented.
- Demonstrate a variety of paper sculpting techniques that can be applied to mask (curling for hair - folding for noses - curving for eyelids - crimping for hair - etc) Demonstrate clipping the top and chin of mask and gluing to make three dimensional. Encouraging layering colors.
- Review color planning
- The basic form is made with a 9 x 12 inch piece of construction paper. Fold paper - draw contour for mask and cut out. The paper is held vertically and then the center top and bottom is cut in about 1 ½ to 2 inches. The cut section is pulled together and glued.
- Students build onto the mask form considering the following: Symmetry (cut two shapes at one time - cut nose and mouth with center on the fold), breaking the edge (extending beyond the contour of the mask), layering of color, and patterns. Unity is important. Breaking the edge can be accomplished in a variety of ways - adding horns - hair - beards - scalloped edge - geometric shapes
- Layer colors. For example a yellow triangle can be added to a black mask. Then a smaller red triangle can be glued in the center of the yellow one. Then a smaller blue circle can then be glued in the center of the red triangle. Use a variety of papers.
- Patterns are made by repeating lines, shapes, or a theme. An interesting pattern can be developed by using the small circles from left-over from punching holes in paper using a hole punch.
- Try creative folding to create 3-D forms
Evaluation:
- Did students show an understanding of mask characteristics in designing their own mask?
- Did students try a variety of paper sculpting techniques to create relief elements?
- Did students show design principles of balance, repetition, and unity in placement of colors and shapes?
- Did students exhibit craftsmanship in cutting and gluing?


No comments:
Post a Comment