Friday, January 29, 2016

All About Me....

6th Grade Hand Designs
"I look to a day when people will not be judged by the color of their skin, but by the content of their character"
-Martin Luther King Jr.


Wednesday, January 27, 2016

Black History Month


7th Grade Stamps
Black History Month Postage Stamp Lesson

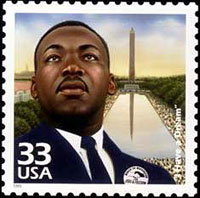
In 1940, the first stamp issued in honor of a black American was released. The image was of educator Booker T. Washington. Since then, many black Americans' lives and contributions have been celebrated on stamps. Some of them include Harriet Tubman,abolitionist; Billie Holiday, jazz singer; Ralph Bunche,statesman and Nobel Peace Prize recipient; Martin Luther King, Jr., minister and civil rights activist; Jackie Robinson, baseball player, and Madam C.J. Walker, entrepreneur.

Before beginning the design work, students need to gather information about black Americans and events that are important in their history.


Materials:

Smartboard presentation

Chromebooks for research

newsprint and pencils

Copy of templates
Drawing Materials... pencils, colored pencils, fine tip markers
black sharpies

Lesson:
After watching a Black History Month presentation on the Smartboard, student will research on their Chromebooks ideas for their Black History Month stamp. When ready, students will design a stamp honoring a black American, place ,event or contribution. Students are to create rough sketches on newsprint first. Download the blank postage stamp or have students re-draw their stamps on the template. There are some basic elements that must be included on the stamps. They are as follows: USA, 49 cents, a person, place, or event, with an image. Designs should be highly detailed, creative and demonstrate fine craftsmanship. Have students draw their designs with colored pencils, black pens, or fine tipped markers.


Wednesday, January 20, 2016

7th Grade Perspective / Value Winter Paintings

My 7th graders have been learning about value. We made these snowy landscapes by mixing tints and shades of the same color. We also discussed overlap and perspective, how far away things look smaller than close-up things (the trees).


My students did a really nice job painting the trees! I broke trees down to three kinds of line to simplify them; the tree trunk is a thick line, the branches are medium lines, and the little twigs are skinny lines. We looked at reference pictures on our Chromebooks and developed practice sketches. This helped the students create beautiful trees with confidence.

This project took 4 days. The first day, we talked about value, and divided our paper into 5 sections and penciled in some basic trees.  The top section was the black of the paper background. We painted the next section a shade of the color they chose (blue, green or violet). A shade is made by adding black to the color. The second day students used the pure color. We painted the middle section and tree with this color. The 3rd day, students mixed a tint. The tint was made by adding white to the color. We painted the second from the bottom section with the tint. The last day, students used white to paint the bottom section and the closest, largest tree.


Tuesday, January 19, 2016

Recycled Art..

                                                   Snowmen


Materials needed...
newspapers
wallpaper samples
recycled ribbon
twigs
scissors
glue