


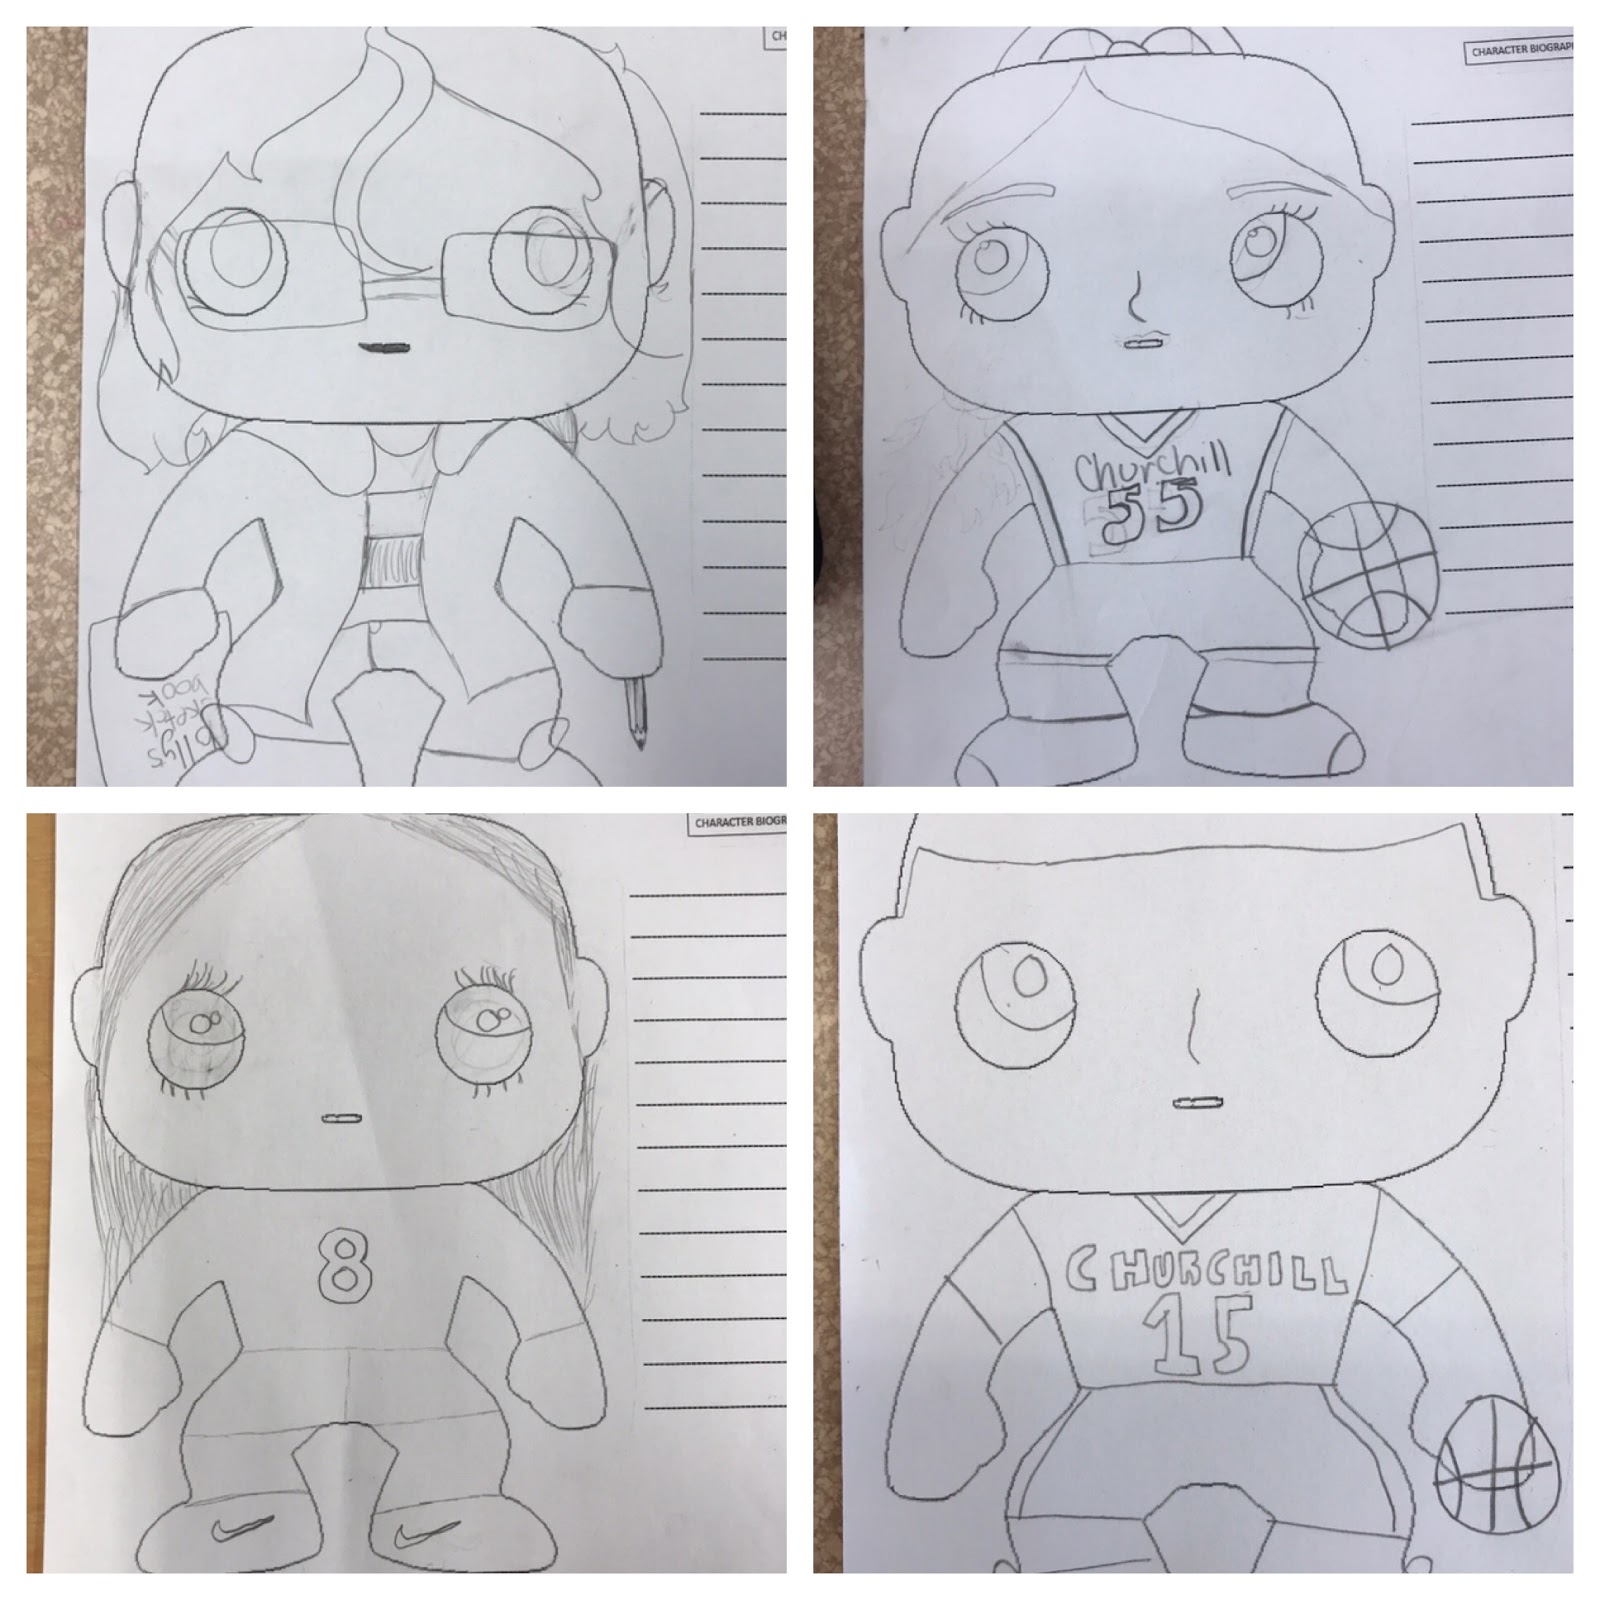
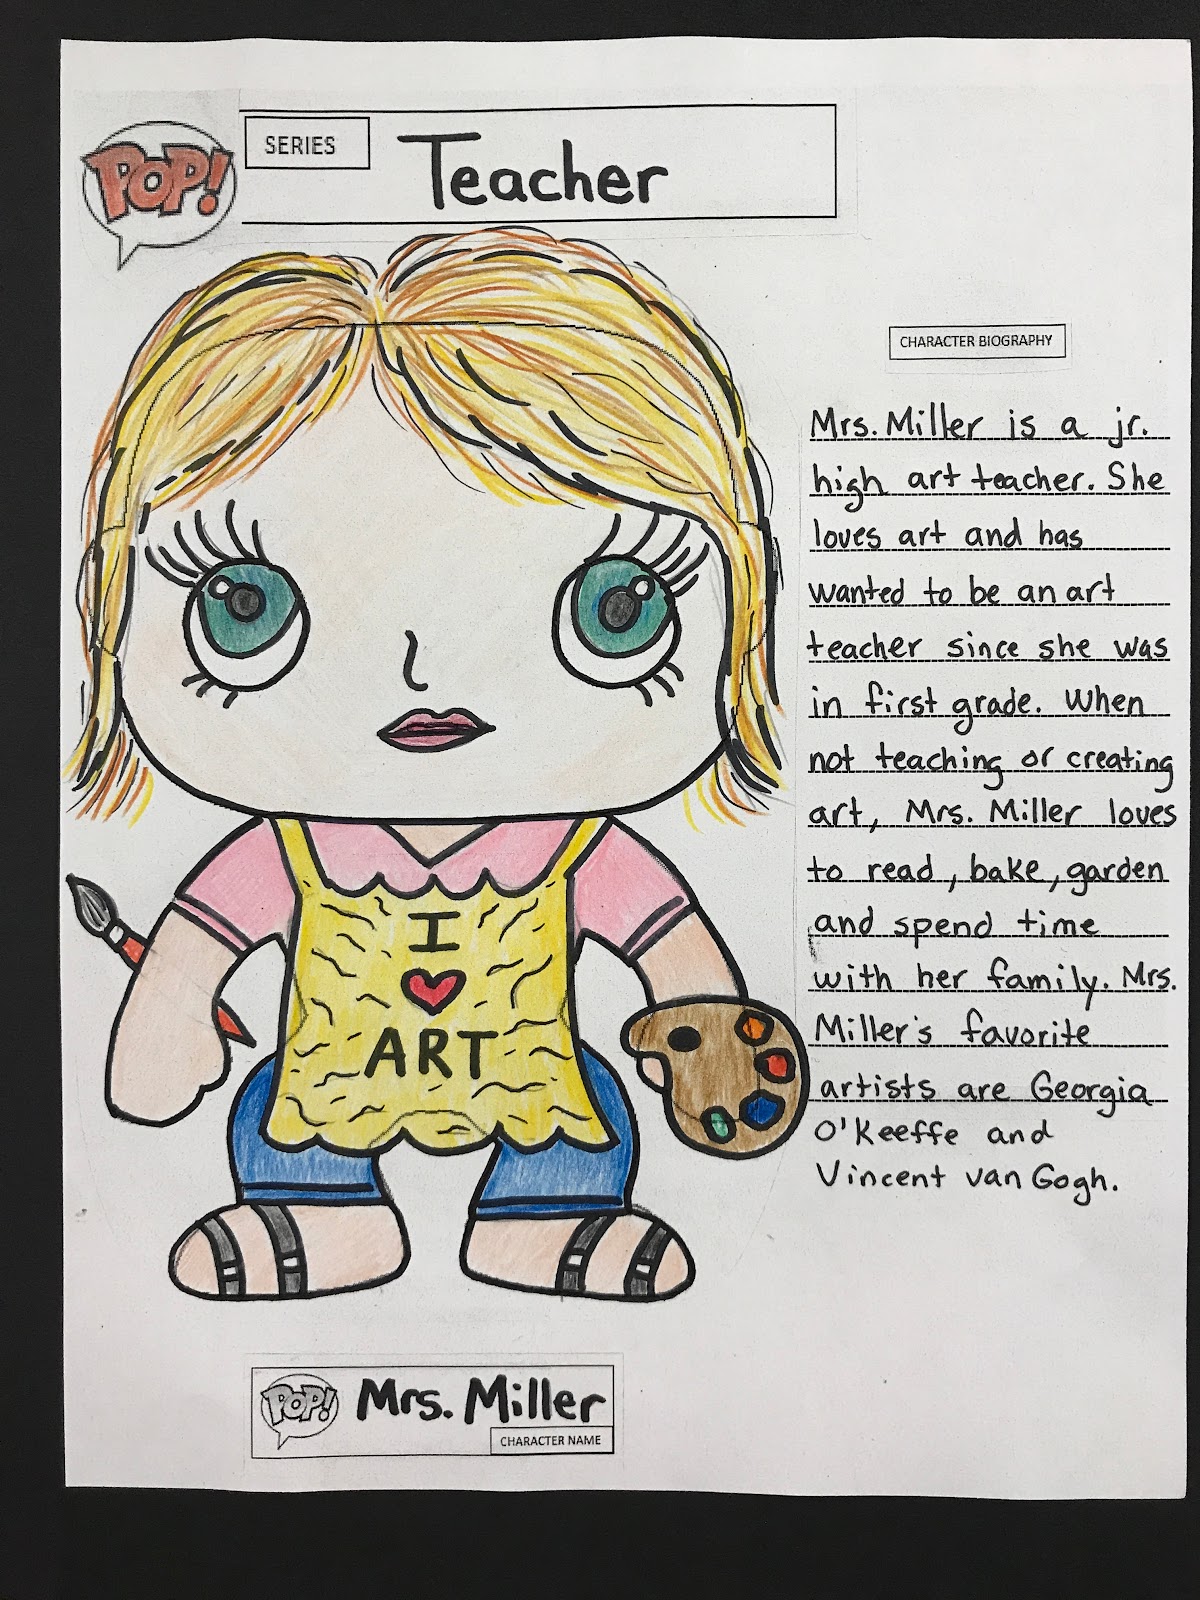
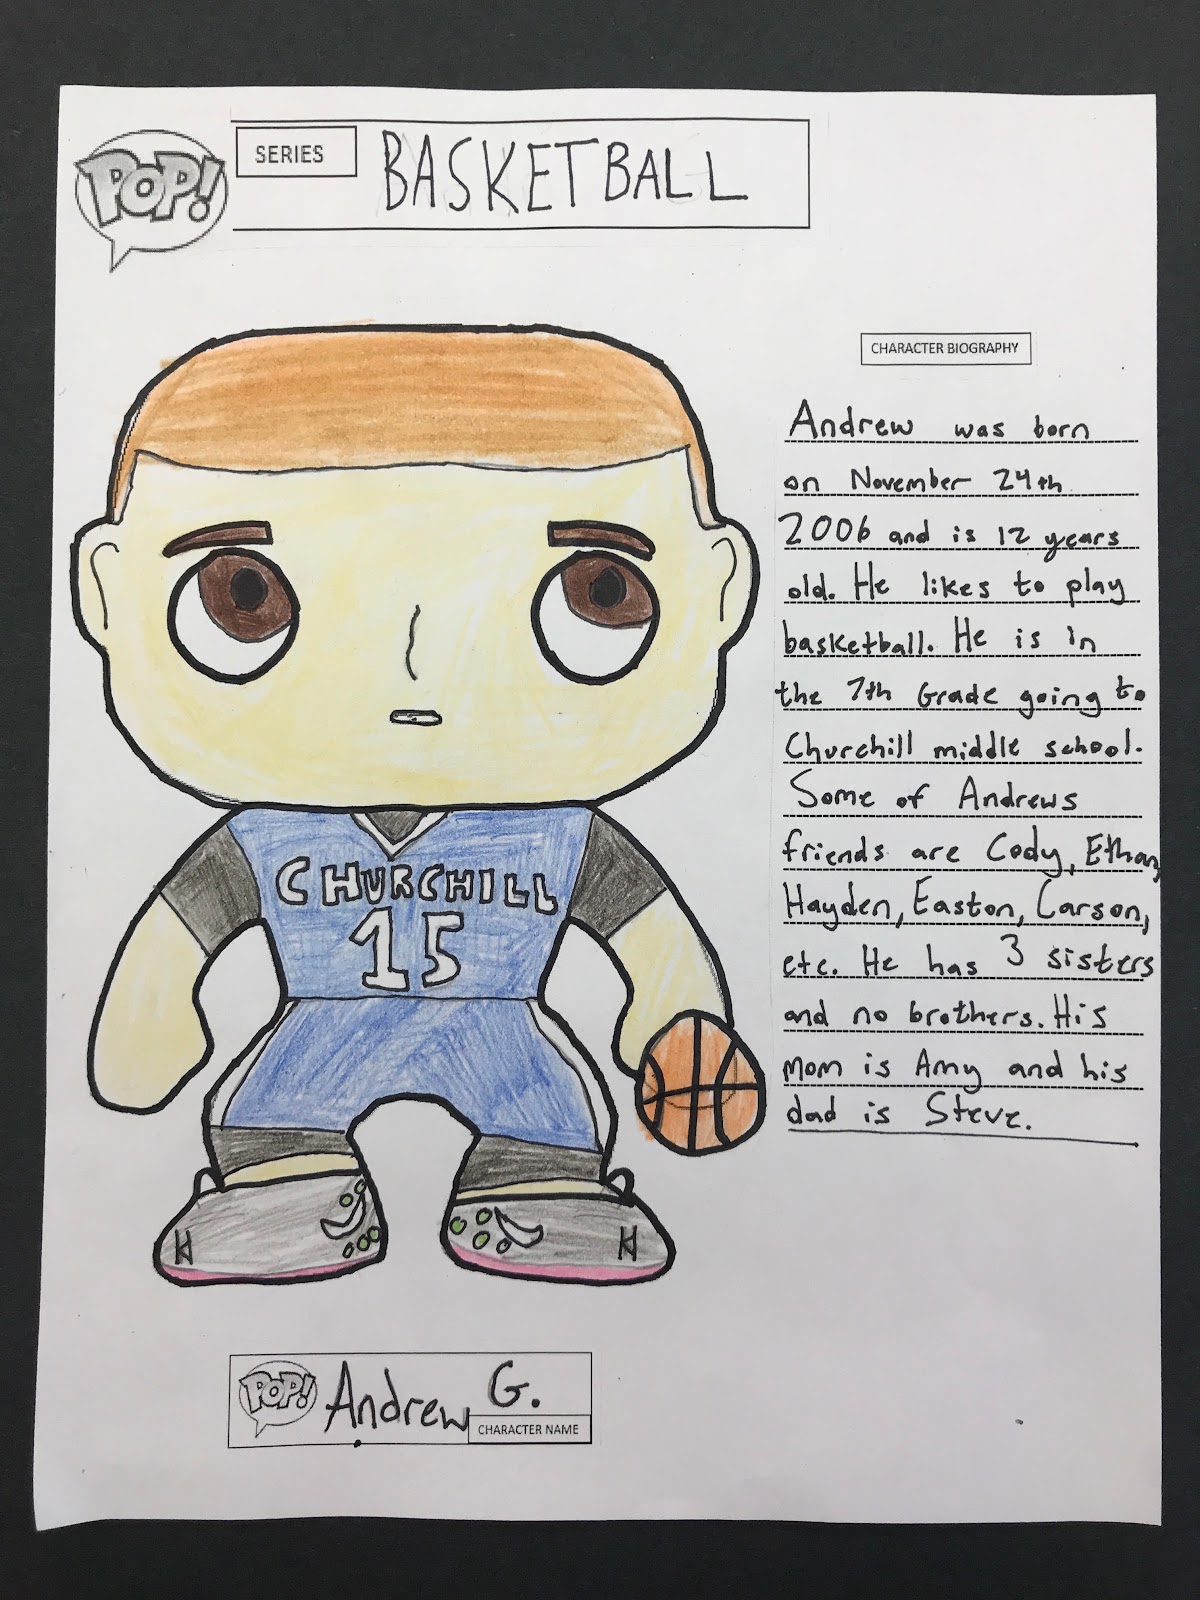
Objective: Students will create a Pop Character of themself, based on the
Funko Pop figures. Students will write a short, descriptive biography for
their character. Students will then present their character to the class.
Have fun designing your look!
Day 1 and 2 - On a template, students will design and color their figure.
Be neat and creative! Think of your own unique characteristics, hobbies,
clubs, sports and qualities. Draw out the design in pencil first, then add
color with colored pencils or markers.
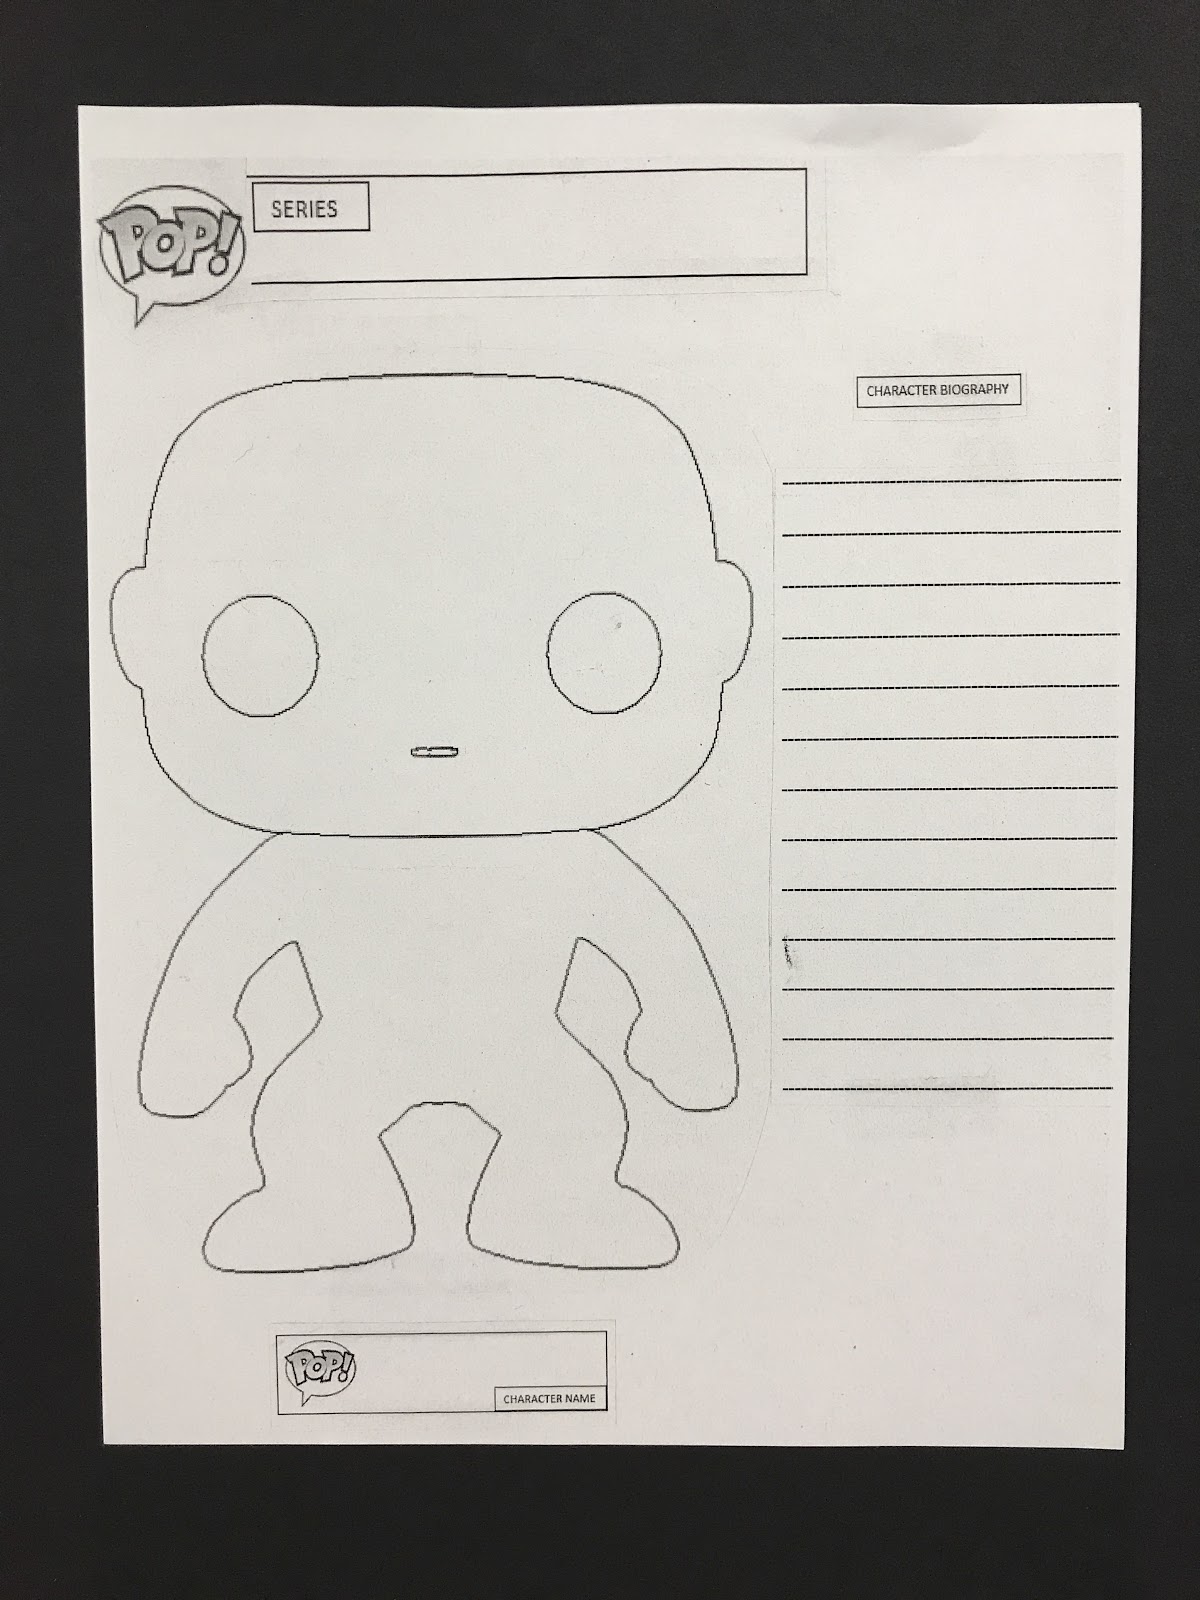


Day 3 - Students will name their character and write a biography,
explaining their Funko Pop Design. The biography should be well
thought out, detailed and in full sentences. They may type their
biography on a google doc first, as they plan.
Day 4 - Students will present their Pop Character to the class.
Presentations will be assessed with the
7-12 Public Speaking Rubric.
Teacher will teach and demonstrate presentation expectations.
Teacher will teach and demonstrate presentation expectations.
25 points total...
Use appropriate eye contact - 5 points
Use appropriate volume and pronunciation - 5 points
Use appropriate body language - 5 points
Display a finished character that is colored, named
and has a biography - 10 points
Rubric Name_________________
Appropriate Eye Contact 5 4 3 2 1
Appropriate Volume and Pronunciation 5 4 3 2 1
Appropriate Body Language 5 4 3 2 1
Finished Project-colored, named and biography 10 8 6 4 2
Comments:
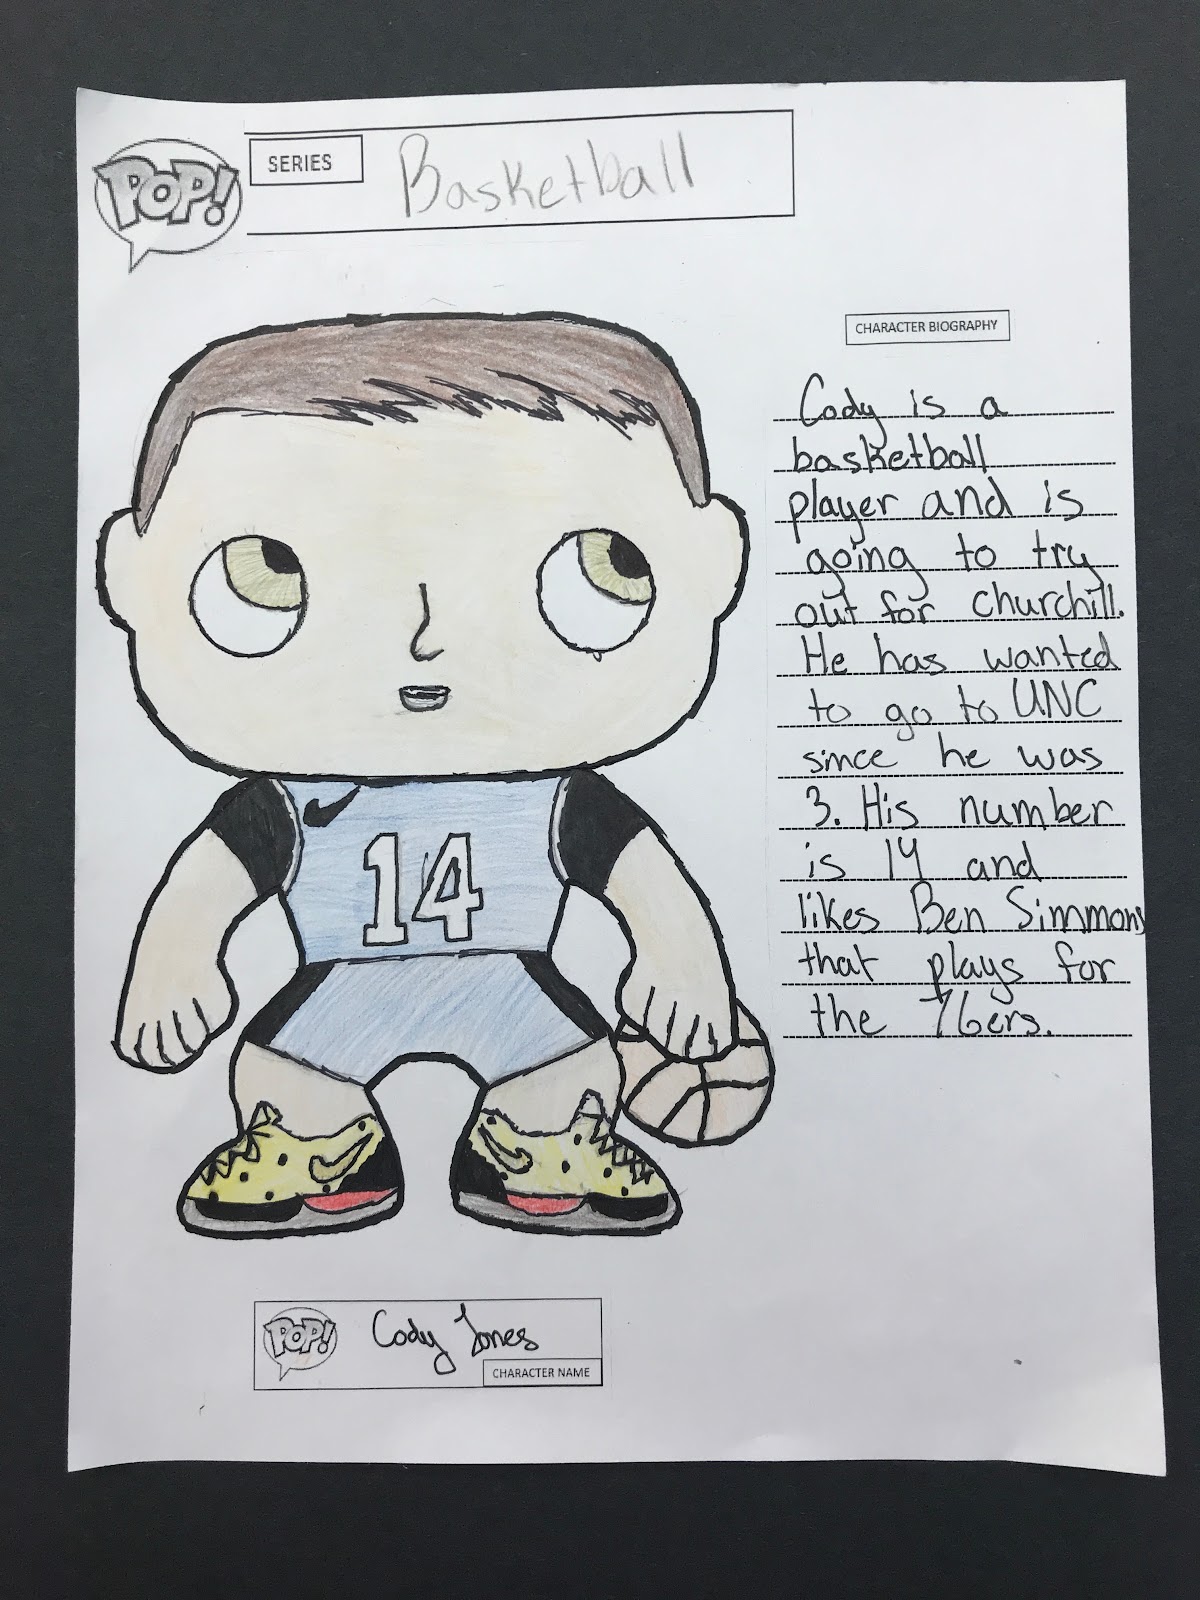
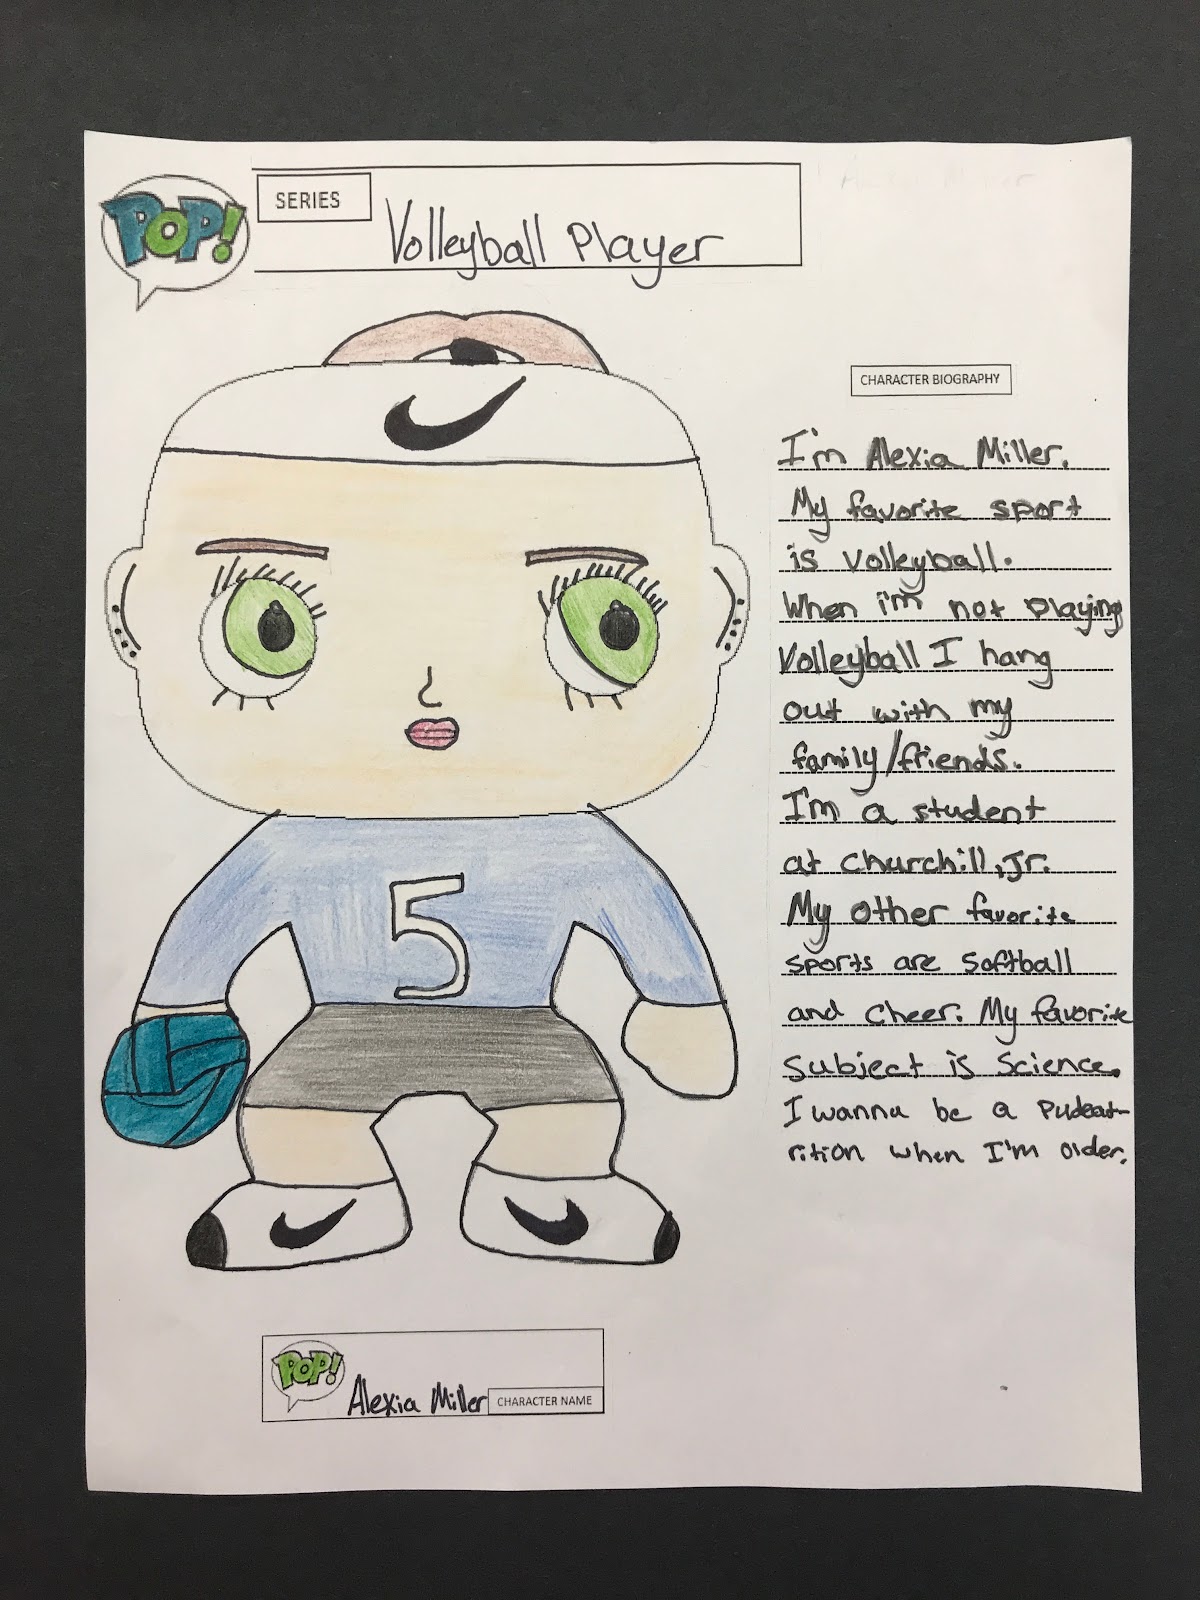
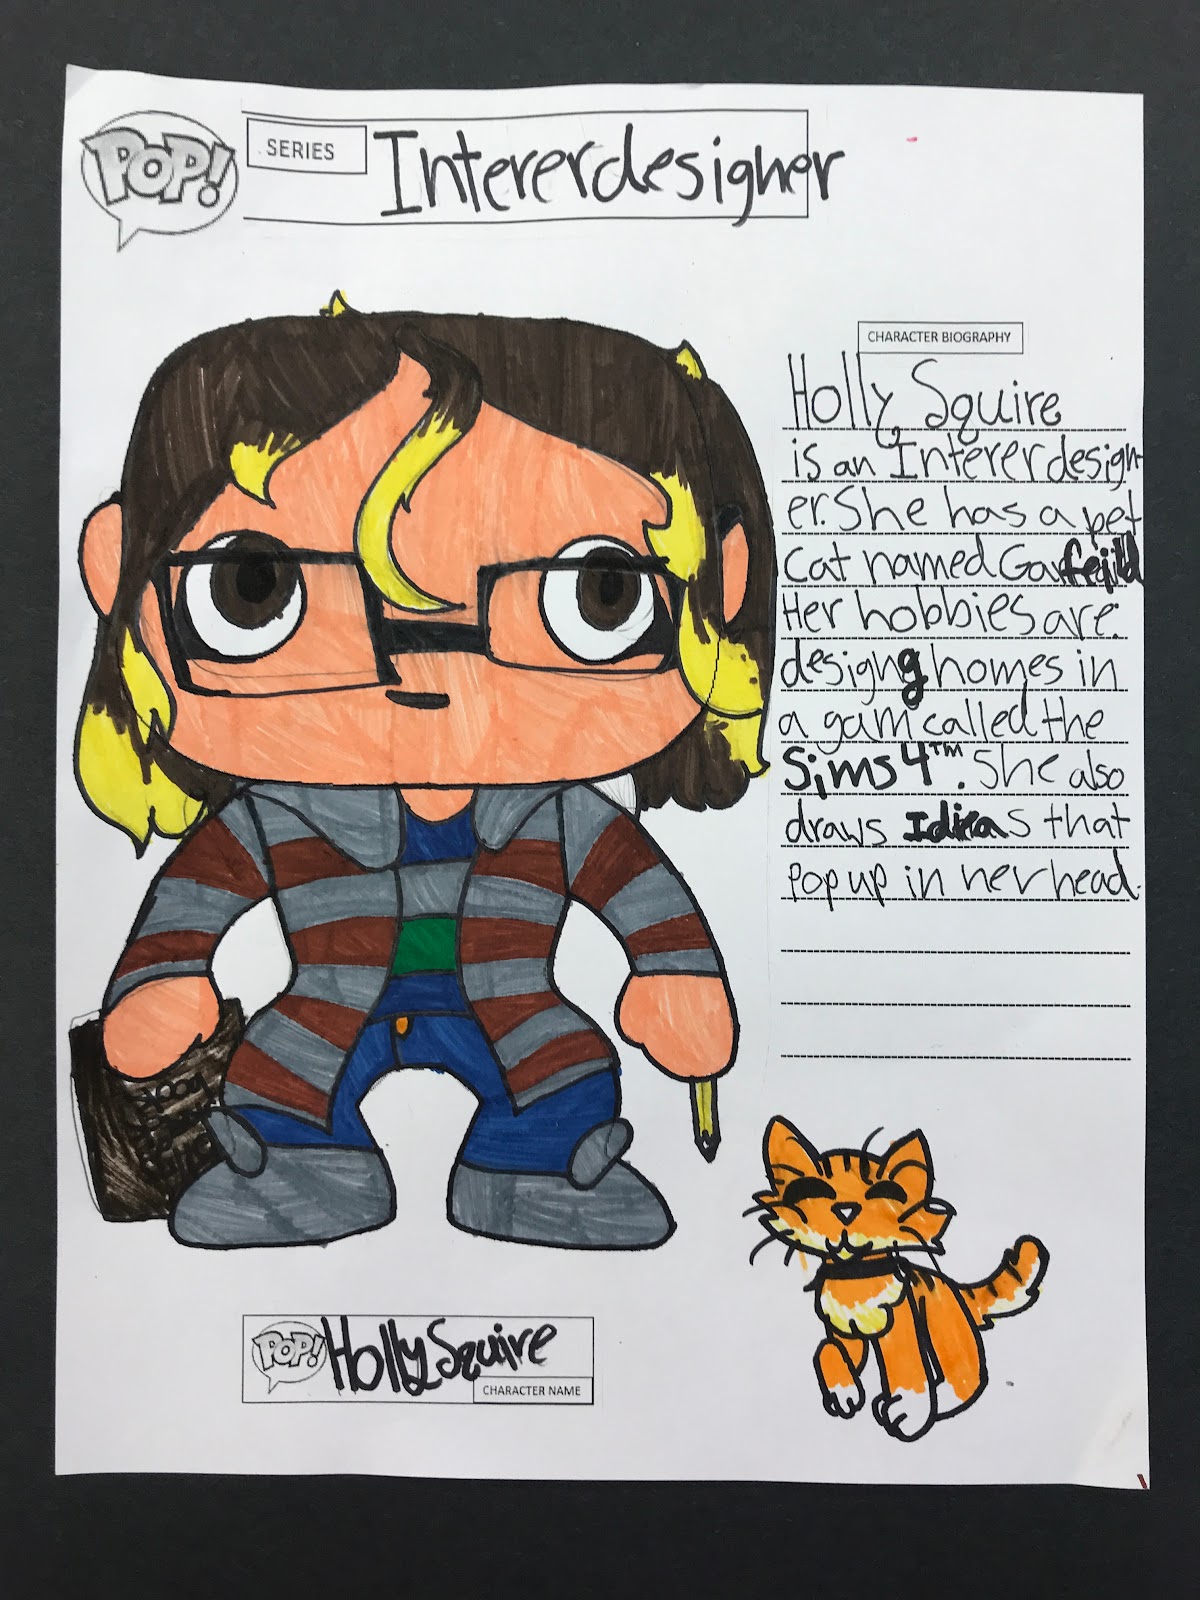
Example….


