Thursday, December 8, 2016

8th Grade Op Art Hand Design


Op Art – Also known as Optical Art; a style of visual art that uses optical illusions
Optical Illusion – a visual image that looks real but is not
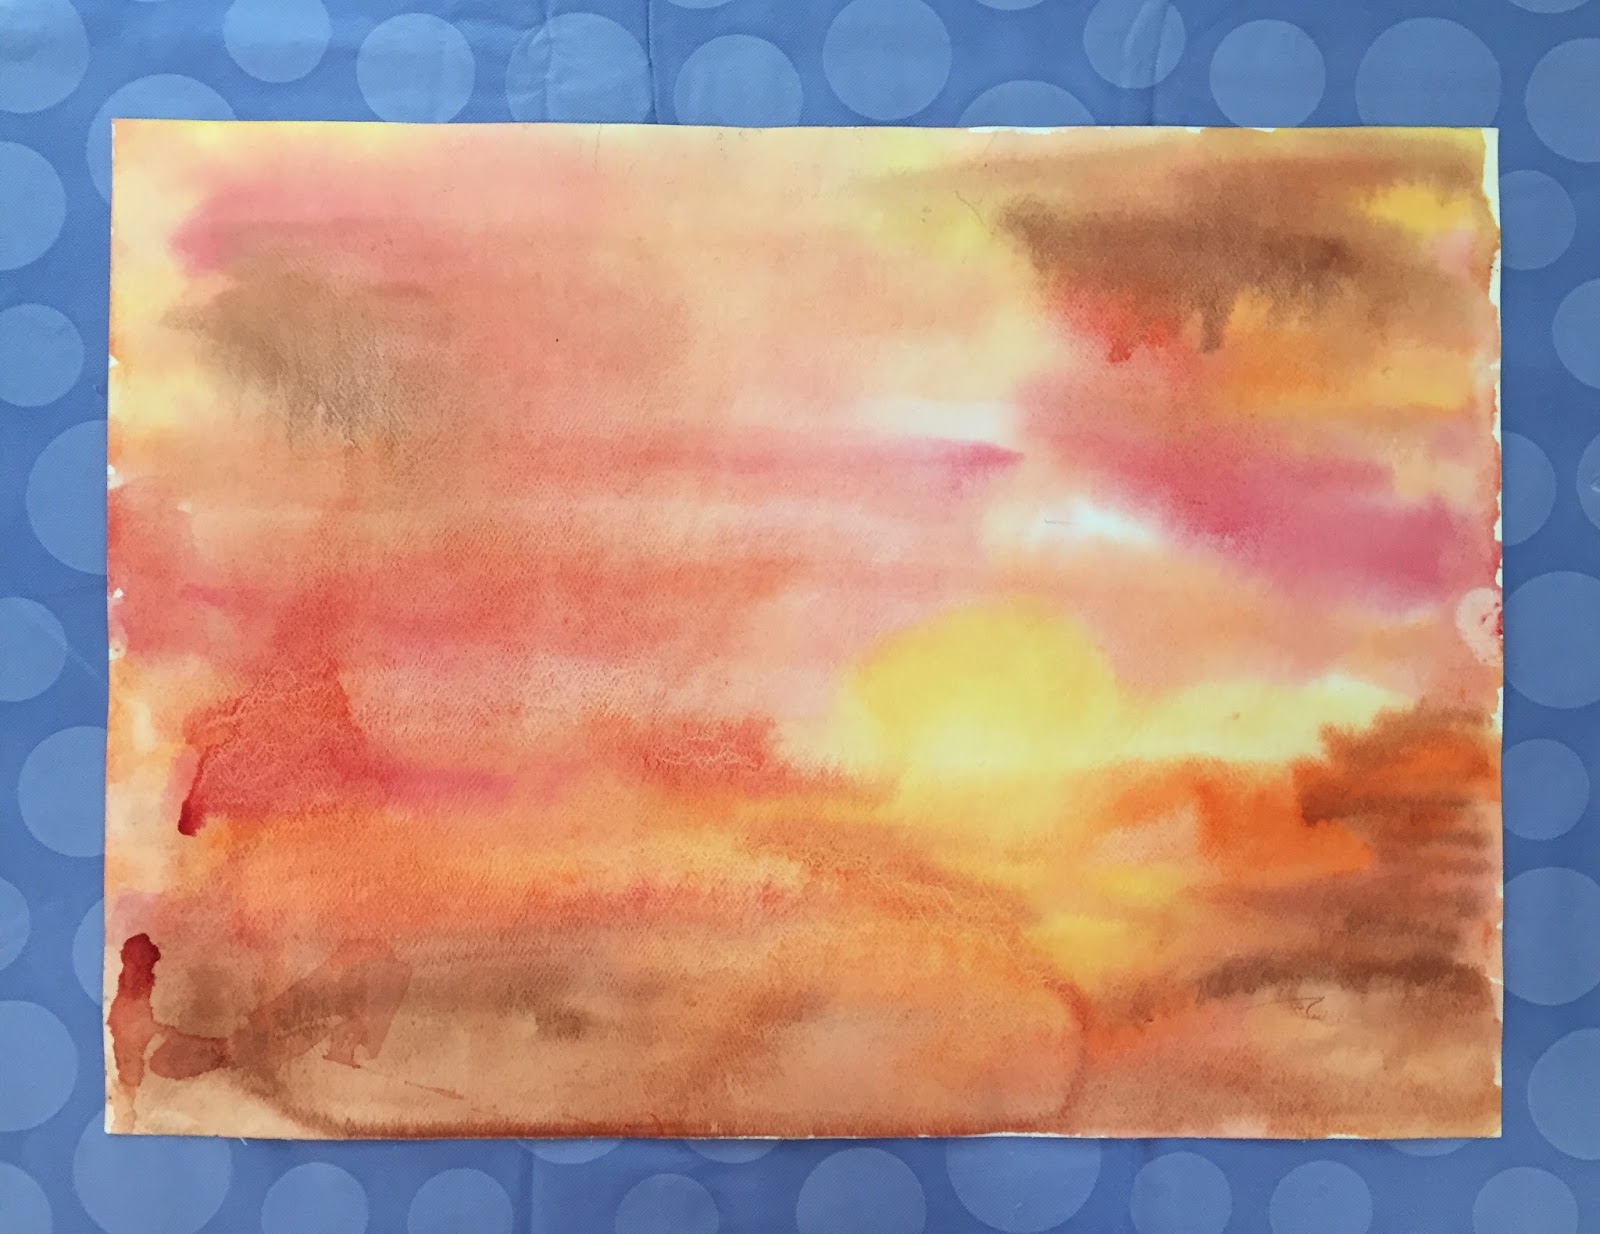
Warm Colors - Red, Orange, Yellow
Cool Colors - Blue, Violet, Green

IMG_4071.JPG
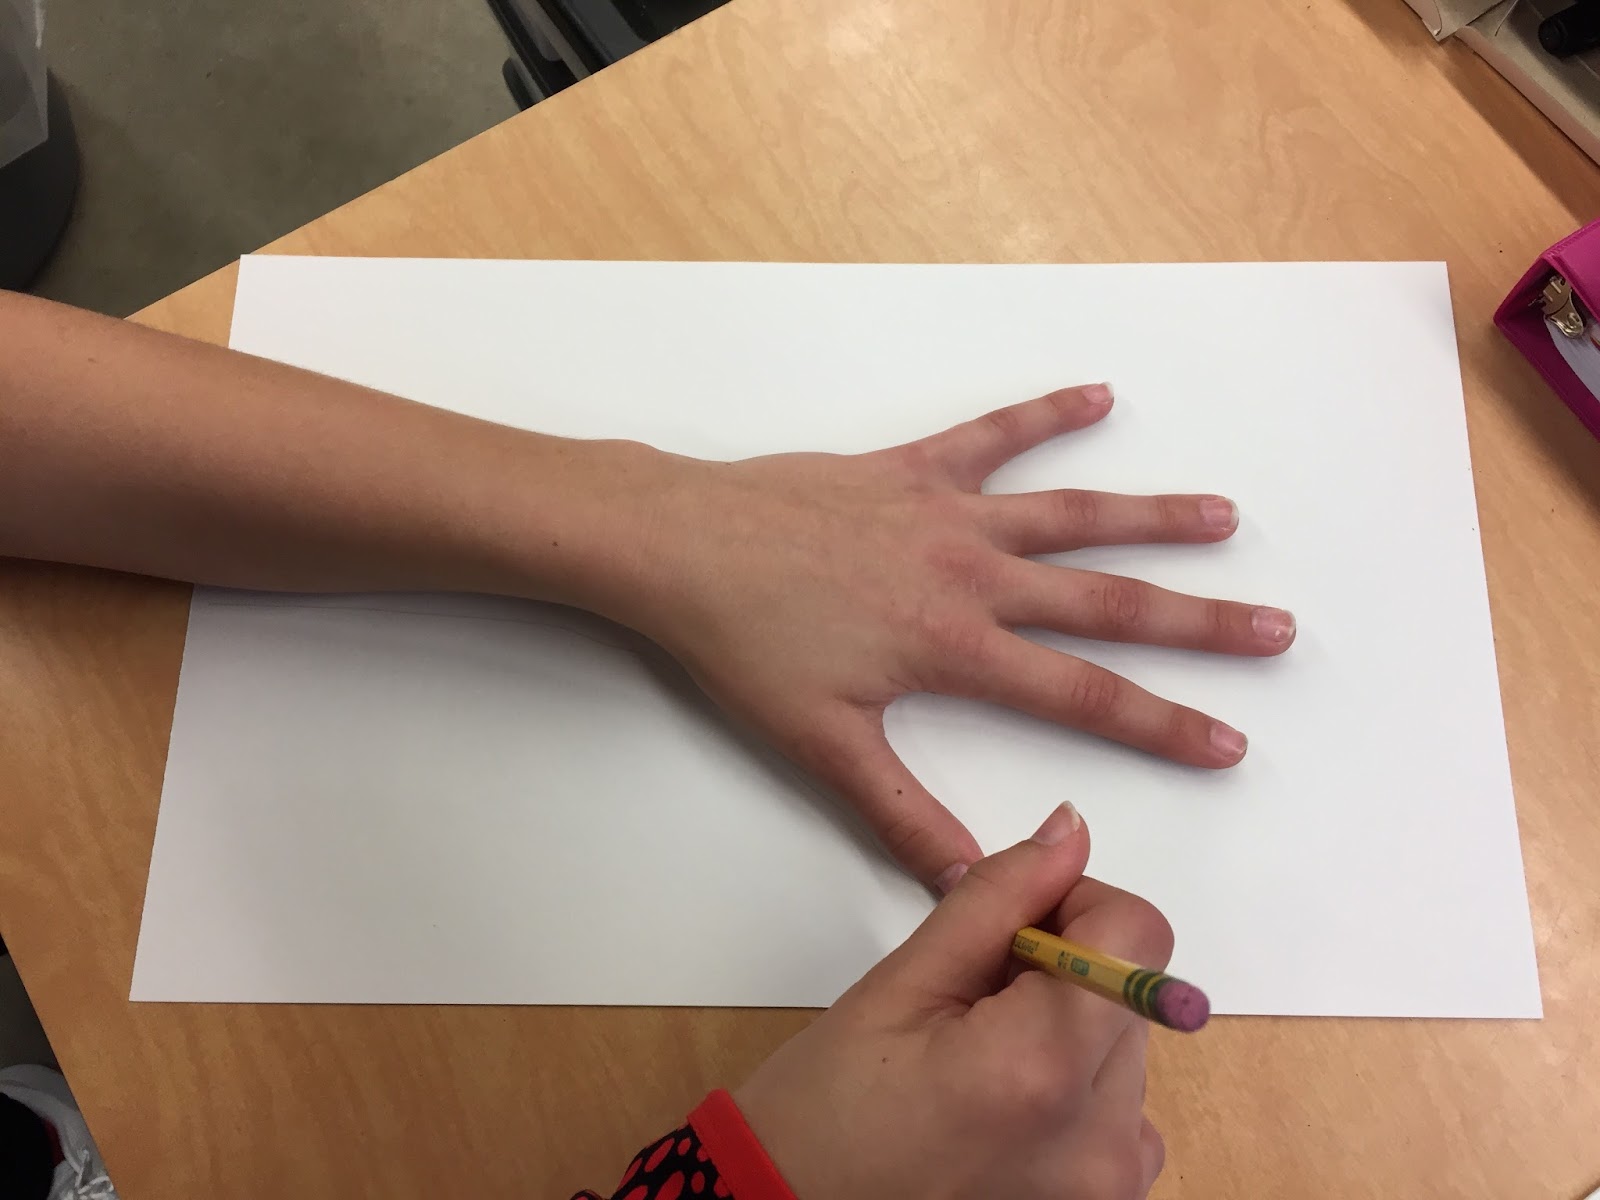
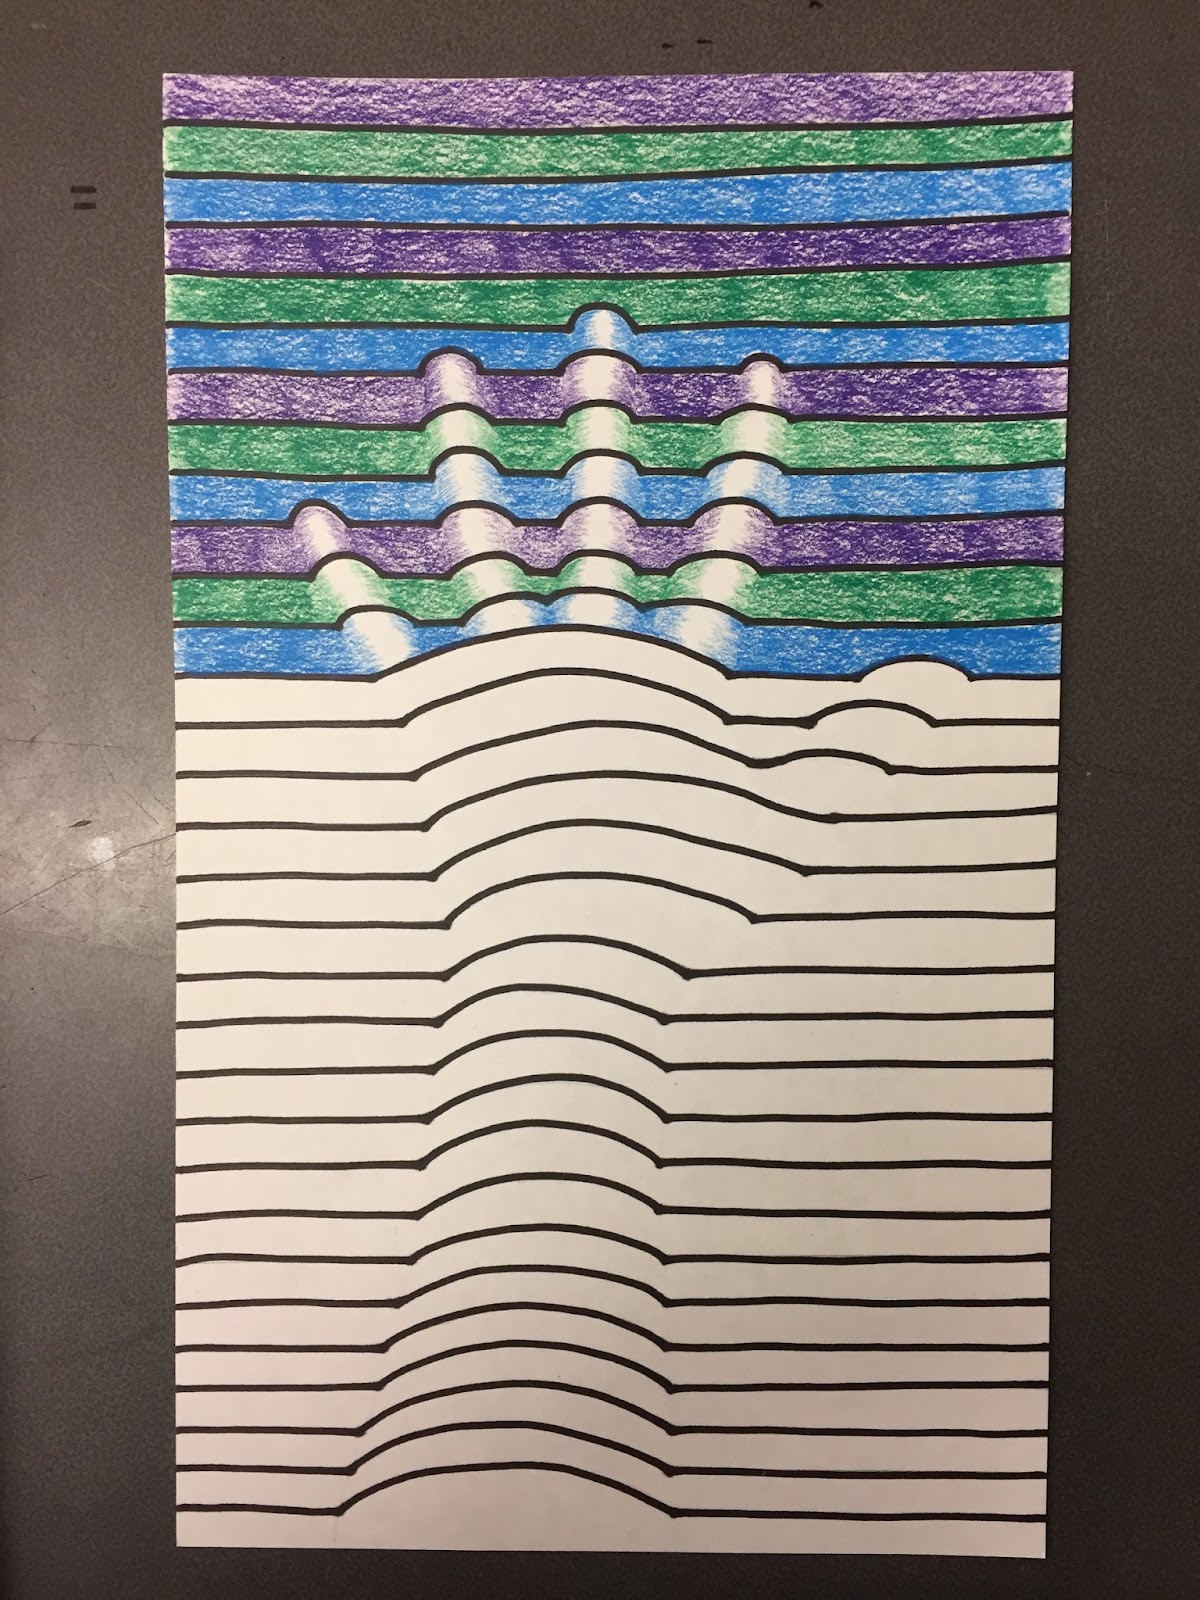
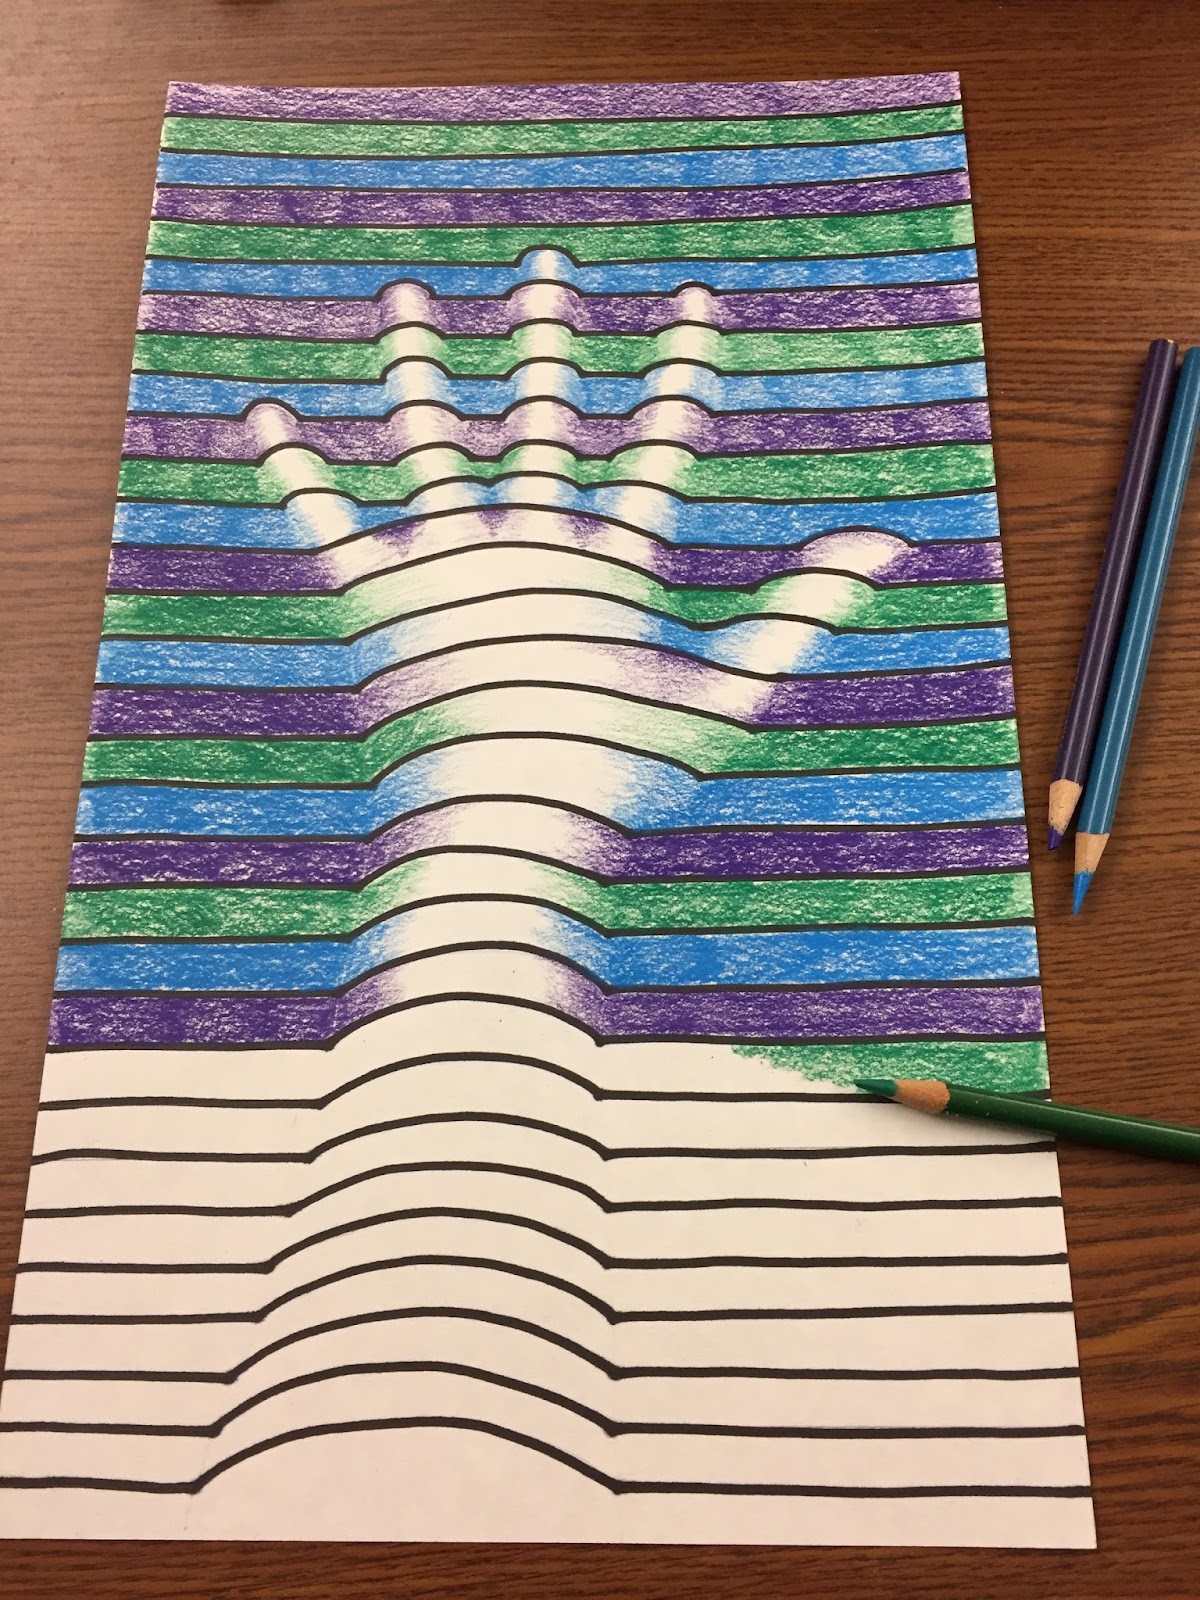
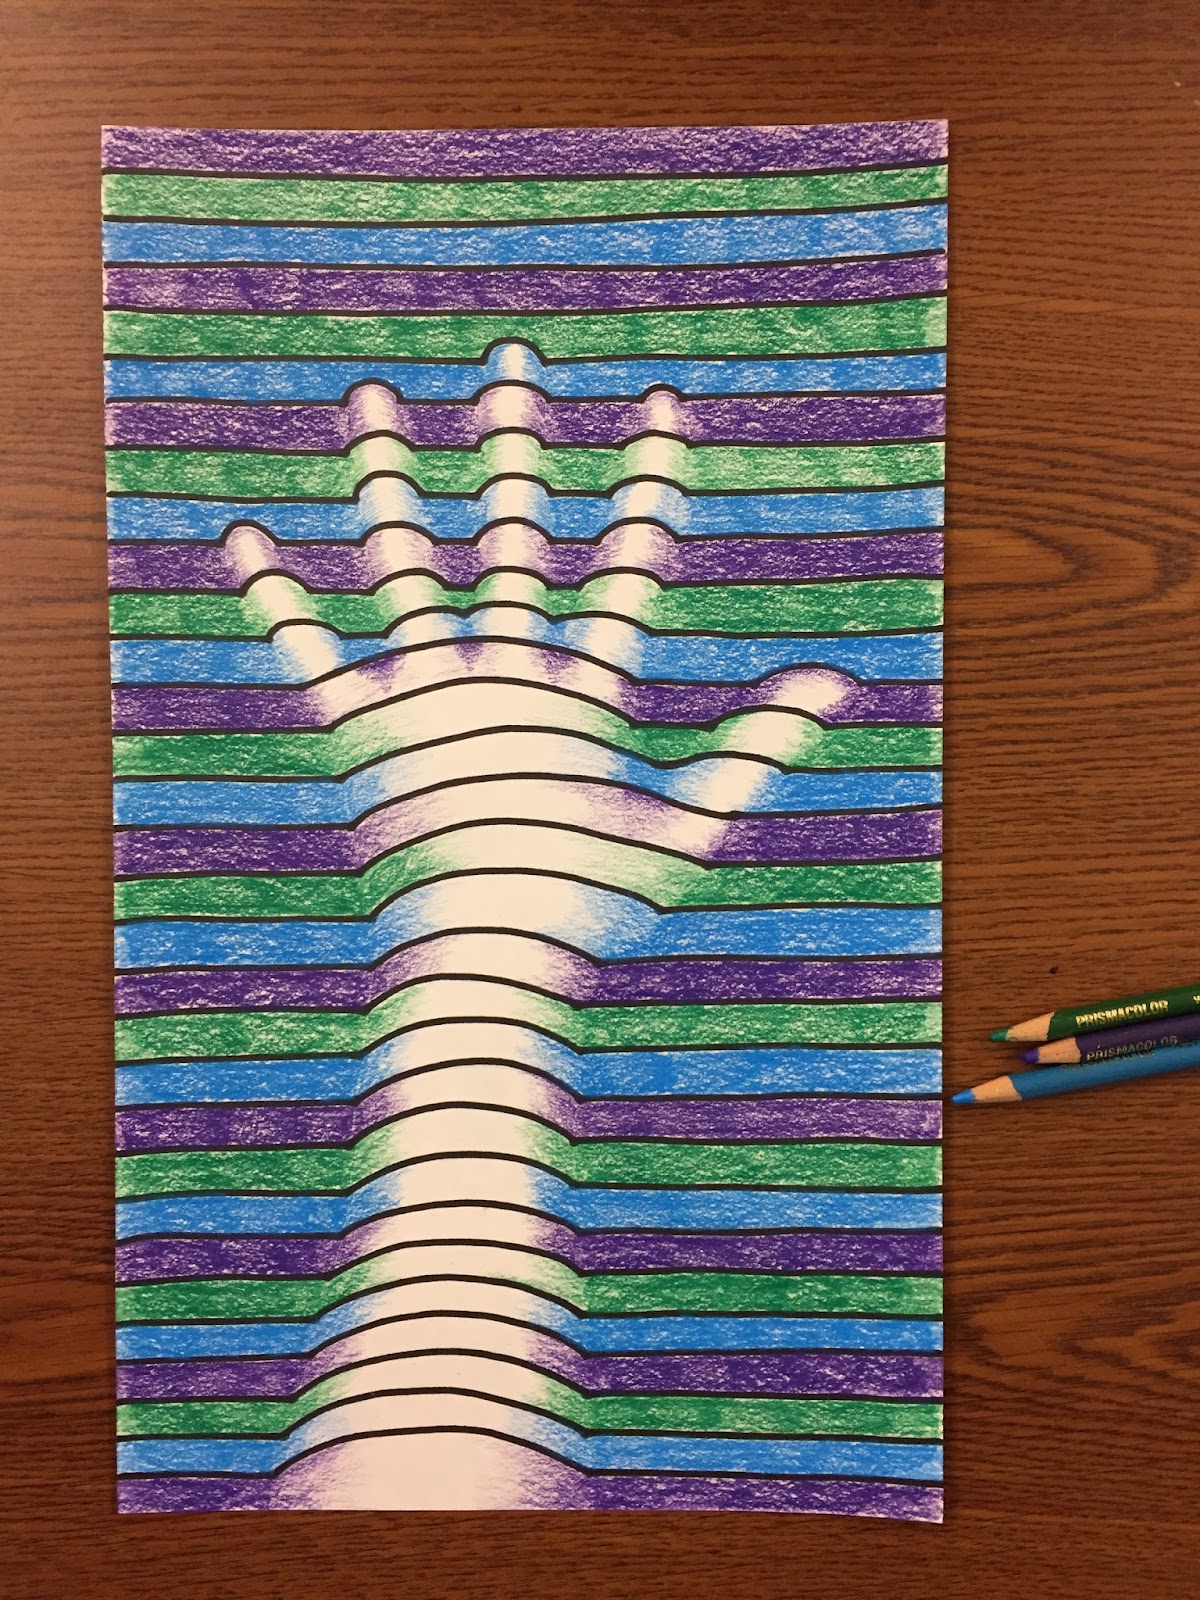
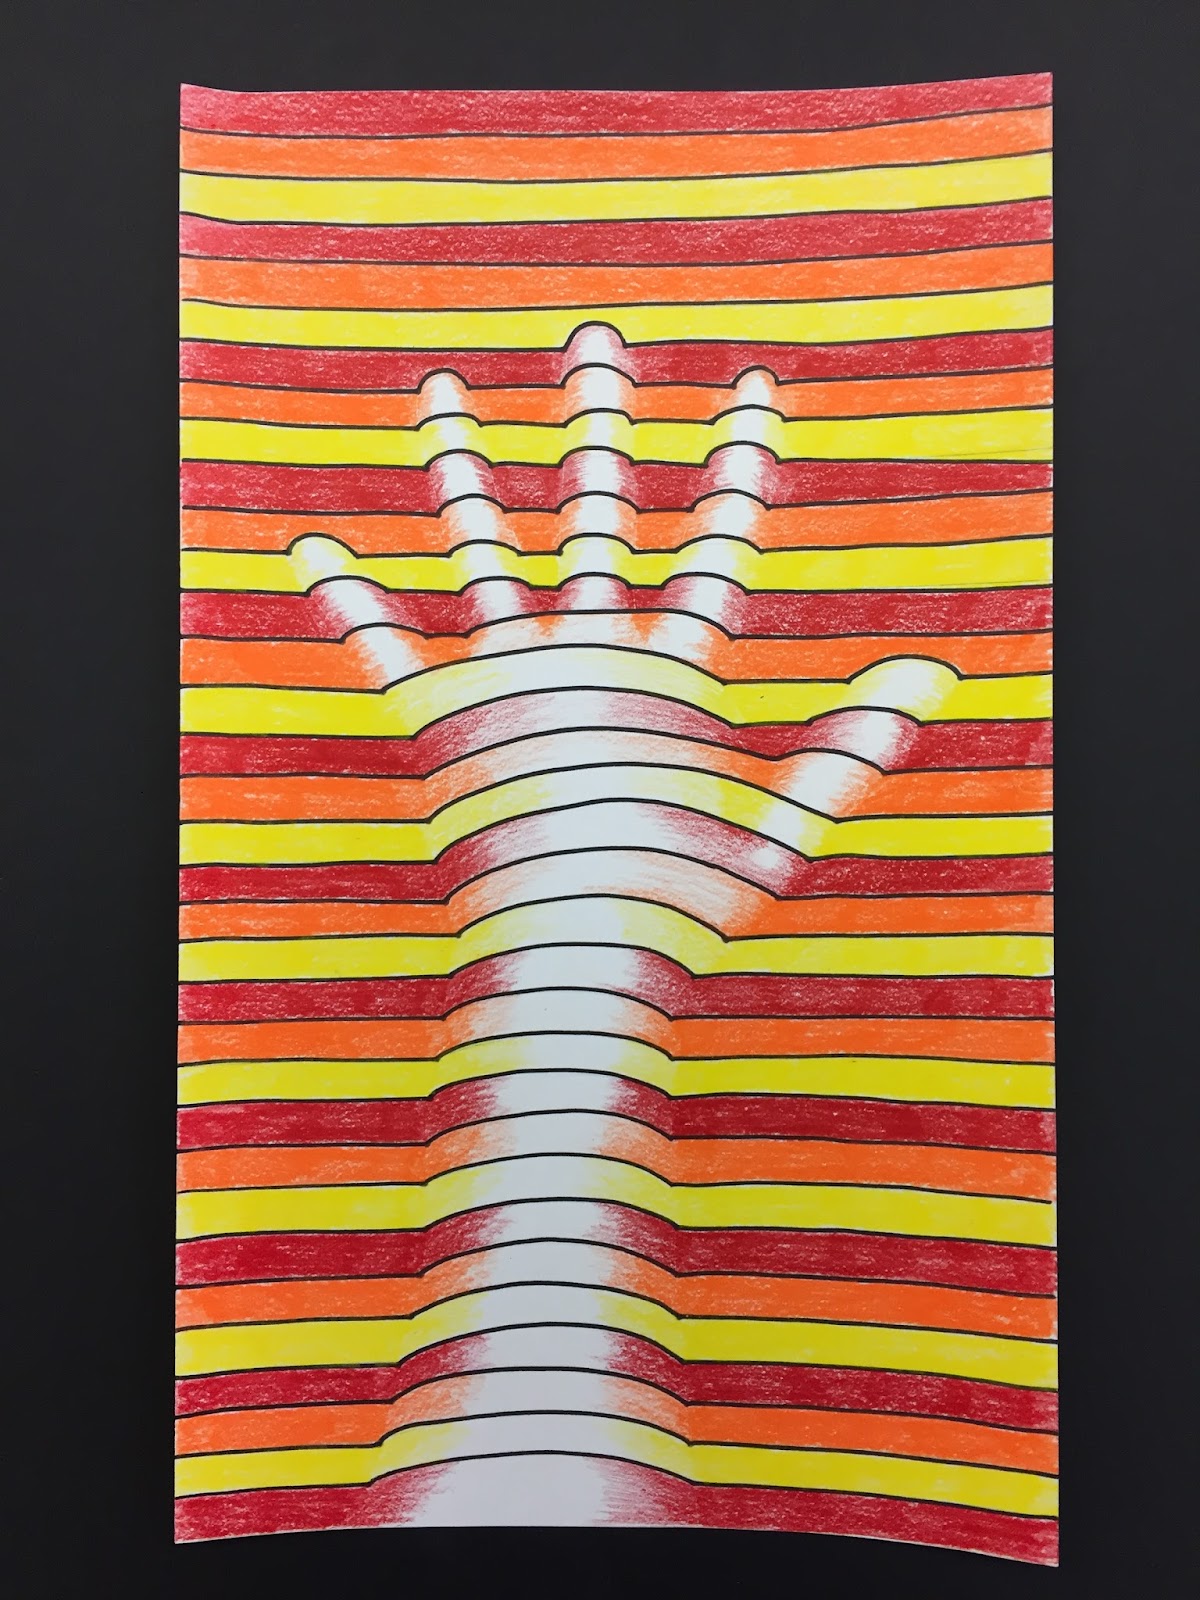
Step #1: Trace your hand with a pencil, include your forearm.

Step #2: With a ruler, start a horizontal line at the edge of the paper. When you reach your wrist make the line curve up as if it was going over your actual  wrist Do this in pencil first.IMG_4034.JPG
IMG_4059.JPG

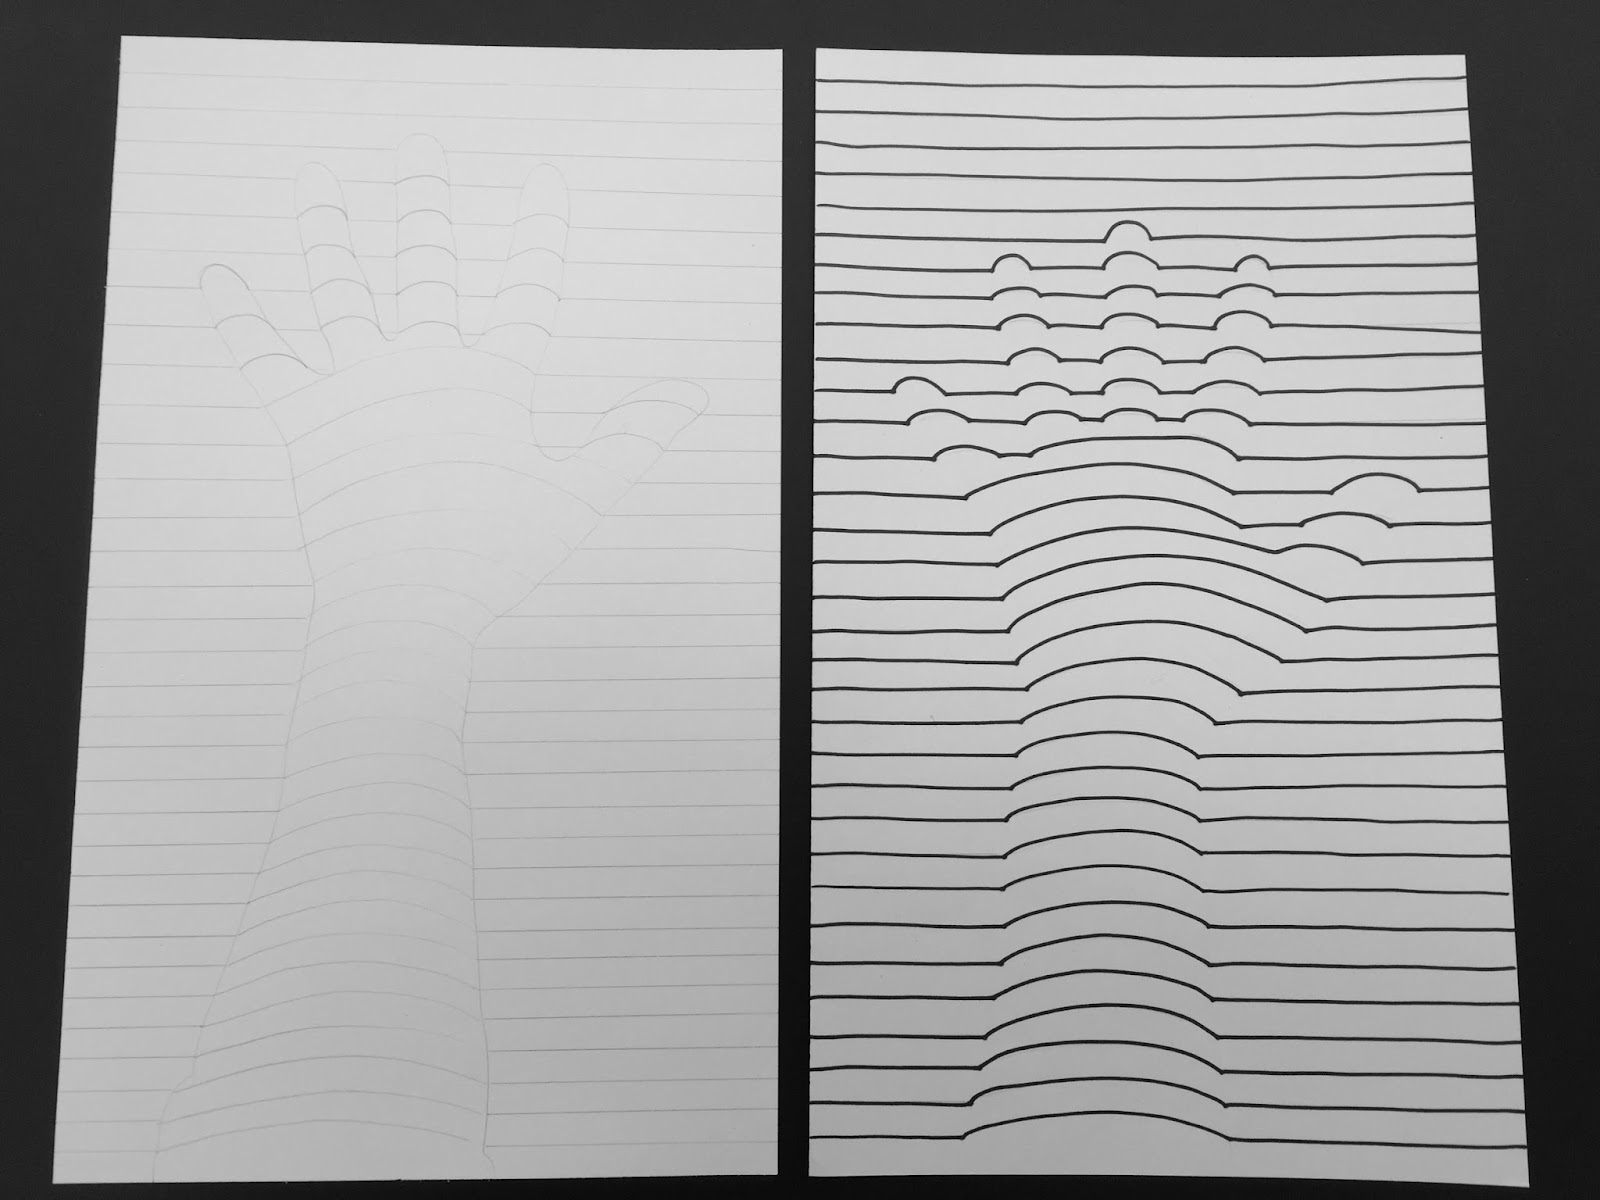
Trace over all your contour lines with a Sharpie
Choose a color scheme of either warm colors or cool colors
Warm colors - Red, Yellow and Orange
Cool Colors - Blue, Violet and Green
  • DO NOT TRACE THE PENCIL OUTLINE OF YOUR HAND WITH SHARPIE!
  • Erase the pencil outline of your hand
  • Start at the top of the page with your colors and work your way down the page.
  • Leave a highlight in the center of the curved lines - where the fingers and hand are.
IMG_4063.JPGIMG_4075.JPG
IMG_4079.JPGIMG_4068.JPG

Wednesday, November 23, 2016

Thankful Designs

I am Thankful for....

Showing our appreciation today in the art room!


I am thankful to have a job that I truly love to do everyday! I am so grateful for my enthusiastic, energetic, creative, amazing students!
Happy Thanksgiving! 

Friday, September 30, 2016

6th Grade Watercolor/ Cut Paper Art Project

Watercolor SilhouetteIMG_2441.JPG
Objective – To try out a new watercolor technique (wet on wet wash) while creating an original silhouette scene.
Day 1 – Demonstrate a wet on wet watercolor wash sunset.
Students will each paint a sheet of watercolor paper with a wet on wet wash. Students will only be using warm colors on their washes (red, yellow and orange). Wet the entire sheet of paper. Wet one color of watercolors and load the brush with paint. Brush the color over the wet paper. Rinse the brush and add a second color and then the third, blending the colors together by shifting the paper around. The water on the paper will allow the paint to run together. Cover the entire page so that the colors resemble a sunset. Let dry.
IMG_2438.JPGIMG_2439.JPG


Day 2 & 3 – On black paper, sketch silhouettes of outdoor symbols (Barn, fence, mountains, park, landscape, cityscape, etc.). Using scissors cut out the shapes. Glue down the shapes onto the dry sunset.


Friday, September 9, 2016

Illuminated Letter Name Designs

8th grade art students created an Illuminated Letter Name Design this last week in art class. Each student drew a letter that was symbolic to who they are. We also discussed a colored pencil shading method called graduated shading. After learning about shading, each student demonstrated graduated shading in their art work.


Finished designs...